Sunday, February 12, 2017

Unzipped Cat Lips Card Holder Tutorial

After finishing last week's nasty cat quilt block, inspired by #pussyhats, it occurred to me that I could easily turn it into a useful cardholder. So here's round two. 
Depending on the word you embroider, this project can be a political encouragement to speak out, or a fun present for a child. It can snugly hold a gift card, a credit card, or, more loosely, an Ace of Diamonds. 
Last week's variation was a 1-hour project. This a 1.5 hour project, depending how fast you make embellishment decisions  (30 seconds to 5 years in my case). You will need:
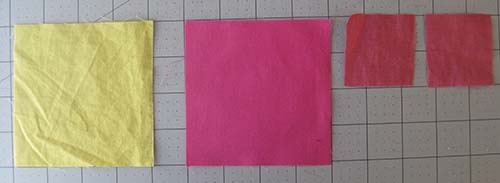
  • Two 2" squares for ears
  • One 4" square for the front as the head. I used blue (I was getting tired of pink)
  • One 4" square for the area behind and above the head. I used gold
  • One 4" square for pocket lining. I used light pink. It won't show on the finished project
  • One 4" square to serve as backing
  • One 4" square of quilt batting (optional)
  • Two buttons
  • A zipper
Fold each ear square in half horizontally, then fold the upper right and left corner inwards. 
Trim a quarter inch off the right and left corners of each ear.
Place the 4" square in your preferred head color - in this case, blue. Make sure the outer corner of each ear triangle is at least 3/8" from the edges of the head square.
Place the inside lining of the head on top of the head square. This square will not show in the finished piece.  Below, I choose pink. Place it over the head and ears, matching raw edges of the two large squares.

Pin that square smack on top of the head and ears.
Stitch all the way across, to hold the ears in position.
Flip open.
Gently pull each ear upward as far as possible, and press.
Seize the 4" square you want to serve as the background, above the cat's head.
The blue cat's head will lie on top of the gold piece, but it has to be shorter. So cut about 1" off the bottom of the cat's head piece (cutting through both layers.)
Place it on top of the background piece, matching the bottom corners and two sides.
Baste the ear pocket onto the background piece. 
Place the 4" backing square on top of a 4" square of quilt batting. 
Place the cat head piece, face down, on top of the backing piece, with the batting still on bottom.
You should be looking at your basting stitches. On the machine, stitch all the way around the square, using a SCANT quarter-inch - maybe a few threads shy. This will allow credit cards to fit snugly in the pocket. Leave a 2" or more turning gap on one side. Don't let the gap include a corner.
Trim the corners to within a few threads of your stitching.
Look in the opening and find the right hole: The one where your backing fabric (green in this case) faces the cat's head (blue).
Carefully turn the piece right side out through that hole, and use a chopstick or its ilk to push out the corners.
Play with embellishments for eyes and lips.
Embroider the word you might want to unzip. Keeping one hand inside the pocket, spell out the words with straight stitches. The word should be flush right for maximum readability after the zipper is added.
I chose a vintage coral-covered metal zipper, with a worn pull, for the lips. Cut the zipper to size, and stitch over the end to prevent the zipper pull from falling off.
Stitch the zipper onto the pocket, again keeping your fingers in the pocket to prevent the needle from penetrating the back.
It's so much fun to zip and unzip this cat's lips! Embellish as desired. I added large stitches to the top of the background and the top of the pocket.

Sew up the turning gap on the side. Now it can snugly hold a credit card, a gift card, or whatever! (Below, my public transit card is halfway in.)
If you like, you can add a cat tail that will make the piece easy to clip to something. 

I started out with fabric cut to 5.5" x 2". Fold in half, RST, the long way, and stitch as shown, leaving a turning gap along one side. 
Turn the right side out, then stitch all the way around.
Thread it through a key ring, D hook, or whatever.
Bring the ends together.
Stitch it too the back of your piece, being careful not to penetrate the front.
What cat themed pieces have you made lately?


Sunday, February 5, 2017

Quick Cat Hat Quilt Block

There are a lot of cat quilt projects and patterns out there, but I never made one - I'm more of a dog person. But that whole pink #pussyhat project (blogged here and here), got me thinking about cat quilts and forbidden words.

Last week, after thinking about this for couple of hours, I stood up and made this.
Yes, it's a worried cat quilt block ornament. It's 3 1/2" square, the ears are flaps (known as "prairie points"), and it's literally a one-hour project. 

(Unless you add whiskers and a keychain, in which case it's a 1.25 hour project:
Start by cutting four squares: 
  • One 4" background square (yellow in this case, I didn't iron enough, but you should) 
  • One 4" head color (bright pink)
  • Two 2" squares for the ears (I used a pink print) 
    Fold each of the 2" squares in half down across the horizontal fold; and then bring the corners into the center. Press shut and dab the flaps with a glue stick to hold the inner flap corners down.
Trim a quarter-inch from each side of each ear:
Fold the head color square down, at least an 1.5" or more. (If you're making more than one block, you can vary the fold to vary the head size.)  Press with an iron to make a clear crease.
Lay the head, raw folded edge down, directly on top of the background square. Bottom corners should match.
Insert ears at least 1/4 inch under the folded head edge, and at least 3/8" in from each side.
A dab from a glue stick under the ears is helpful.

Now you have a choice - either topstitch straight across that fold, 1/8" below it, from one side of the head to the other. (The white dotted line shows where your stitching should go.)
Or, flip the head fabric up temporarily, and sew across the line you pressed in with an iron. You'll be going through the bottom horizontal edges of the ears, to hold them in place permanently.
Trim the seam allowance on the head fabric down to 1/4". Fold the flap back down. Everything's in place.
 This can be pieced into a quilt, with other blocks. Or, to make a hanging ornament, (like mine), cut a piece of quilt batting to the same 4" size (Here I used the top as my template for cutting batting).
Cut a 4" backing:
Stack as follows: Batting on bottom; backing, face up; cat's head, face down.  If you've stacked it correctl7y, you should be looking at the horizontal seam that holds the cat's head to the ears.
Sew 1/4 " in from each raw edge, all the way around, leaving a gap of at least 2" along one side. The gap should not incorporate a corner.
(In this picture, I didn't leave a large enough gap, and had to pull some of the stitching out to make it big enough to turn.) Trim the corners at an angle, and don't cut through the line of stitching.
Turn right side out.
There's still that gap on the side. If you're going to machine-embroider all the features, you can hand-sew the hole shut now.
But if you're going to hand-sew embellishments, leave it open for now. The hole will make it easier to hide starting knots.

I drew the features on with a  water soluble marker, but wasn't crazy about my first draft...
Nasty needed to shift a bit to the right. I tried to correct for that when I sewed over them with straight and backstitches. I hid the starting knot between the layers, using the hole on the side.
The ending knot was buried in the back. (Here's a tutorial on how to do that.)
Almost done. Two green buttons make the cat look startled. (But don't use buttons if this is going to serve as a coaster.)
The outer eye lines took my cat from stunned to world-weary.
 What else can you do with this idea?
  • If you want to add rick-rack whiskers, like in the second photo down from the top of this post, cut the rickrack to the width you want, and drip a fray-checking liquid or glue on either end.
  • Make angled heads. (But do these look more like roosters?
  • Make a bunch of blocks, with different colors, head sizes and angles, and turn it into a signature quilt - have friends sign and/or embellish it. 
  • Embroider a political statement.

(Now that I look at this drawing, it looks more like pyramids, or maybe pointy bosoms?)
  • Beanbag
  • Pincushion
  • Coaster
  • Pin (brooch)
  • A nap quilt for a small child. Go wild with colors and prints.
  • Make it 14" square background, and sew it into a pillow.
  • Make it 18" square and turn it into a tote bag.
  • Have fun! Send pictures!
To see the #pussyhats I made, check out this post and this one. To see this idea turned into a card holder, check out my next post, here.