

Has it ever happened to you that after you've pieced something, you hold it up and look at the front side, and then the back side, and then you realize that the latter is a lot more interesting than the former?
It happens to me often, especially when I make log cabin blocks. But 99.93% of the time, I do the conventional thing and say a lingering, sad, forever farewell to the wrong side as I lay it against the quilt batting and entomb it. (Perhaps someday we'll be able to lower tiny cameras in our quilts so we can admire the reverse sides.)
On extremely rare occasions, i.e. only this one time, I go for backwards! Below is the 2.75" x 9" quiltlet above, closed, as a wrist cuff (napkin ring, paperweight, etc). The fish is actually a wooden button cover, with a button underneath.
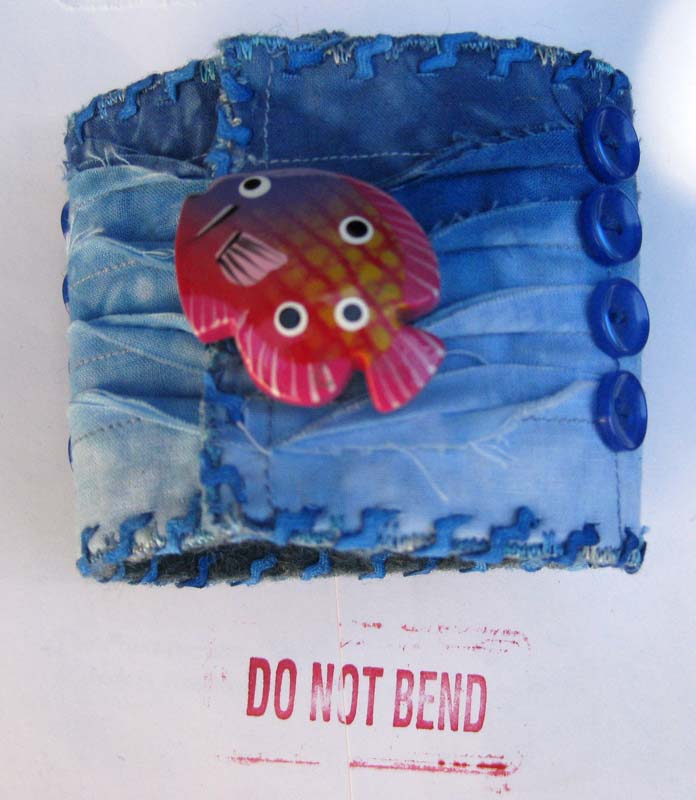


Are you wondering about the edge treatment? It's pretty cool in the sense that achieving it gave me an an excuse to buy yet another fascinating though not necessarily lifesaving and, let's face it, totally self-indulgent, sewing notion:

I found some vintage tiny white rick-rack, painted it marine blue with Liquitex acrylic paint (in an uneven coat, on both sides), let it dry, then wove it around and through the rotary-cut slits.This edging treatment came to me, literally, from amazing Florida quilter Lori Weiss, who edged a fabric postcard with a narrow rainbow-colored rickrack through the slits, which sent me over the moon! Thank you, Lori!
Do you have any interesting rotary cutter blades, edge treatments, and/or quilts that show the backside of your piecing?
PS Shared on Nina Marie Sayre's Off the Wall Friday, at http://ninamariesayre.blogspot.com/. Wonderful art by lots of people there!
Love the cuff + + + that GREAT fish really adds the zing.
ReplyDeleteI have never used the back side. However, I have purposely sewn in raveled edges just because I like the look.
Cathy, I love your cuff. It is fun and cute. I would wear it in a heartbeat. Your creativity is awesome. I have that blade my another manufacture but haven't used it yet. maybe your cuff will spur me to play with it. Maggie
ReplyDeleteMaggie, be sure to send me a complete report! I am wondering how the other one is different! Thanks for coming by!
ReplyDeleteI have been doing a lot of hand-stitching in the last couple of years and think the back side of the work is just as interesting as the front. If I ever get a chance to exhibit this work I'm going to try to have it hung in space so both sides are visible.
ReplyDeleteGreat idea, Kathleen, although it won't be a "quilt" anymore....Thanks for stopping by!
ReplyDeleteCool cuff! I've felt the same way about the back, maybe I'll get up the courage to use it instead. Your result is perfect!
ReplyDeletebest, nadia
Thanks, Nadia! The back is fun, you'll love it!
ReplyDelete