A couple of weeks ago, I showed improvisational hashtag quilts made from batiks and printed word fabrics. Below are 4 1/2 very different, very fun hashtag projects, made with solids and/or novelty prints.
First, a potholder inspired by hashtags, but really more of a tic-tac-toe board since it's not slanted. The sashing is watermelon fabric. (I cannot explain why I combined chopsticks and watermelon; I think those two fabrics were on top of my scrap pile.) The cornerstones are a white-on-black polka dot. The blocks celebrate chopsticks, except...
...the lower left corner, which celebrates Western cutlery. This is just a simple piecing project - cut nine 4" squares, 12 pieces of 4" x 1" sashing, and four 1" x 1" cornerstones - sew it all together, it's fast!
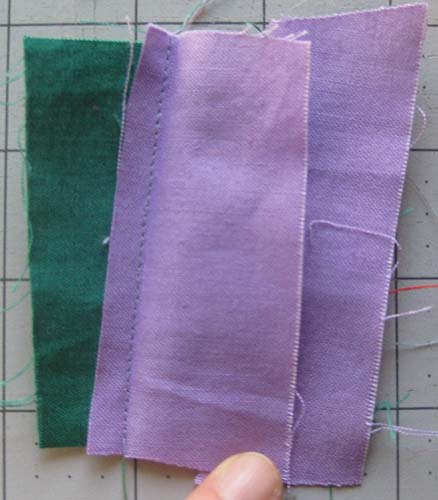
Next, a slash'n'stitch project that puts the hashtag at more of an angle. I started with a solid 8 1/2" square. Plus, two strips about 9" long by 1 1/2" wide.
Cut horizontally 2 1/2" down from the top, and up from the bottom, straight across. I used a ruler and rotary cutter to make these cuts straight, but you could use no ruler, or even scissors, to make them a little wonkier.
Sew in the strips.
Cut at an angle.
Do it again. Now you have two cuts. Keep everything in order.
Sew another 1 1/2" strip (slightly longer than the square) onto the leftmost piece.
Press open.
Sew in the middle segment.
Press open.
Sew in fourth contrasting strip.
Press. Add the final segment of the background and press open.
Trim overhanging edges. Optional: to make the hashtag "hang", add strips of whatever width you want, same color as the background, to the four sides.
Throughout the process, I ironed all my seam allowances inward (but you don't have to). I like that it gives the hashtag a sense of being in front.
Now comes the fun part: What is your hashtag about? Here are some of my tests. #Polkadots?
#Cabbage?
#Meditatemore?
#Cat?
#Cappucino?
You'll see what I finally chose in a future installment.
UPDATE: Vermont art quilter extraordinaire Carol McDowell read this blog post, and within a couple of hours, she made her own hashtag quilt block, using this method:
Carol is a social media maven, and proposed we post our hashtag blocks on social media with the hashtag "#hashtagquiltblocks." I'm all in on that! I added that hashtag to my Instagram photos. Also see Carol's beautiful blog at https://quiltedfabricart.blogspot.com/.
Below, another slash and sew project. Instead of insetting straight strips, it involved insetting wedges. Start with a rectangle or square - this was a 9" square of mixed nuts fabric. Slash as desired.
From a contrasting fabric, cut wedges slightly longer than the square. Place them with the wide end in alternating positions. (The wide end of the pretzel insert is on the right side in the top cut, on the left in the bottom cut.)
Stitch.
Cut apart in the opposite direction, at an angle.
Lay in two more wedges, with wide ends alternating.
I pressed the seams inward, for a 3D look.
I put this piece on a double layer of batting, plus a backing, and a rat tail loop on the upper left corner. Result: a fun, wonky, potholder.
I shall call it #ChexMix (no financial affiliation.)
Finally, a completely different approach to hashtag construction. It involves foundation piecing with fabric. Start with nine squares or rectangles. I cut these rectangles 2 1/2" wide x 3" high.
Cut a 1 1/2" strip of fabric in a strongly contrasting shade. Cut it the full width of the fabric, and press one long edge up 1/4", all the way across.
Option: use a temporary glue stick. Place the strip at an angle along one long edge of what will be the center top rectangle. Make sure that the top inner edge of the strip (on the upper right of the photo below) is 3/4" or more from the right edge. Add a couple of glue dabs below the seam allowance and press into position.
Fold it over like this. Trim the strip so the top and bottom edges are just a little beyond the underlying rectangle.
Do the same thing on the opposite edge, making sure that when the flap is folded to the left, it fully covers the background fabric.
Press with a hot iron to dry the glue. Sew down the creases.
Press open. From the back, trim away all the extending flap fabric so it can't be seen from the back.
The front now looks like this.
Set the third (and final) piece along the top, at the angle shown.
Glue, then stitch in position.
Again, trim away the area that sticks out from the backing.
Make another one with the exact same angles.
These two rectangles will go at the 12 o'clock and 6 o'clock positions:
Now we'll work on the 3 o'clock and 9 o'clock positions. Add a strip at the angle shown to only one long edge of each of those two rectangles.
Add angled strips to the top and bottom short edges of those two blocks.
Here they are with one short edge sewn in position.
And now we're placing the final, second short edge in position.
Once again, trim those two blocks to the size of the backing rectangle. The arrangement should look something like this.
Sew the blocks together.
Interesting, no? I didn't cut away any background between rounds of sewing, so the contrasting fabric hardly shows from the back.
I'm not yet sure how I'm going to embellish the front. There are probably a zillion other ways to make hashtags - I'd love to see what you've done with them! Post them on social media with the hashtag: #hashtagquiltblocks.


I love the first method and have to try this. It looks like fun. Since hashtags are part of social media I could see these being an online group sharing all the different blocks. Someone must have started such a group . I'm going right now to search on Instagram. #hashtagquiltblocks it's gotta be a thing!
ReplyDeleteDear Cathy,
ReplyDeleteI love your blog. I do not comet very often. (shame on me) But when I see you have a post, I open it quickly. You inspire me. I absolutely love your "unusual" ideas and how you just go with it. Thank you for sharing.
Julie
Julie, thank you for the nice comment! You've boosted my morale! I hope you try some of these kooky ideas!
DeleteAppreciate your patchwork! Every time. Thank you for sharing.
ReplyDeleteThank you, Sue!
Delete