

That blog post included an EPP tutorial. I was deciding whether to combine them into one tablerunner, or finish them separately. Since then, I chose the latter. Here's #1, finished:

The second one is also hand-quilted with motifs inspired by the central fabric:

And below is the third, which my DD pointed out has a Thanksgiving feel. It's machine-quilted. Note: the hexagons aren't as symmetrical as in the first two.


English Paper Piecing is easier than regular piecing in many ways. Seam allowances needn't be perfect, and Y-seams are a breeze. Hexagons become child's play.
But EPP can involve a lot of handwork, which is tough on grownup hands, wrists, and shoulders. Plus, finishing the edges is a challenge. Regular patchwork has only three layers at the edges: top, batting, and bottom. Stitch on a binding that takes up 1/4" of the edges, and you're done.
But with EPP, the top edges are already turned inside. And somehow, the backing fabric also has to be turned under. That makes 4 layers of fabric at the edges, plus batting. A regular binding is not practical. But there's no un-fussy-way to hide the batting inside and turn the back edges inward.
So I did some experimenting.
MAT 1: Classic Same-Shape Lining
Usually, EPPers suggest you make a backing that has the same number of paper-pieced shapes on the edges as the top has around its edges. For my first mat, I gave it a shot, just for the purposes of comparison. First, I traced the finished top (with templates still inside) on batting.


Put the batting down first; center the backing on top of it, and finally the back hexagon wreath on top of that. Pinned in position.


I used a straight hand-quilting stitch to join the edges, as you can see on the lower right corner.

The quilting motifs were hand sewn with two strands of embroidery floss. Here's a closeup of the back:

Not bad! I'm going to quilt the central area a bit more, to hopefully take out more of the fullness there. I'm giving this method a solid B. But it didn't achieve my goal of reducing hand-stitching.
MAT 2 - METHOD 2: One-Piece Backing
From the top, the edge stitching on this mat looks the same as #1.
But it was easier and faster, because I made a one piece backing. First, I had to make a one-piece template for the backing.

I made mine out of old file folder, onto which I traced the top. My folder wasn't quite big enough, so I taped two pieces together - but I should have used a glue stick, so the tape wouldn't melt when ironing.


Removed the cardstock and replaced it with the batting.


Straight stitched all the way around (a whipstitch would work, too.)
Closeup of my straight stitch along the right and bottom edge of this hexagon.


Again, I may do some more quilting in the middle to reduce the puffiness. I'd give this method an "A", except that some of the concave corners look better than others. This has to do with how far I dared to clip (the more you clip, the smoother - but the more danger of holes on the back.) So I'll give this method an A-.

MAT 3 - METHOD 3: Machine Stitched Multiple-Piece Backing.
This is a variation of Method 1, and also recommended by many EPPers - create a backing edging, with the same paper-pieced shapes as the front, and then stitch it to the front, wrong sides out. Finally, turn the backing to the back. I took unfortunate liberties with this approach.Like Mat 1, this approach required 12 handsewn backing hexagons, one to match each of the border hexagons on front. First, let us admire how neat and symmetrical the front hexagons were to begin with.

Here's how they look before the templates were removed.


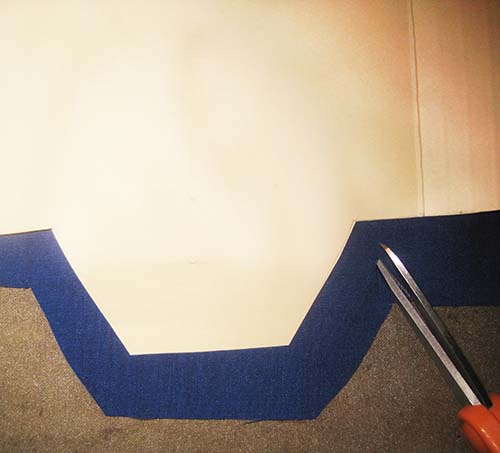
This is where I went off the beaten path. The experts say to whipstitch the backing hexagons to the edges of the top. But my shoulder was aching - so I thought, what the heck, what if I machine stitch all the way around? I sewed about an eighth of an inch in from the edges.


Have you tried any of these techniques? What EPP finishing methods work for you? Any machine methods you recommend?
My favorite EPP method is watch Cathy do it! :-) :-) :-)
ReplyDeleteAs usual I love seeing your steps and variations. Looks like you learned a lot with this little series. I'm sure the lucky recipients will love them.
Thank you, Nili!
DeleteThanks for the post, Cathy. I have a few EPP tabletopper tops pieced and waiting for finishing. You've inspired me to work on finally getting them done.
ReplyDeleteGlad to help, Corinne! Thanks for writing!
Deletehave you tried using the machine stitching on a very tiny zigzag rather that a straight stitch with seam allowance? when opened out it approximates hand stitching quite closely and you really can't tell the difference. I'm going to try the #3 method using this.
ReplyDeleteI have not tried that, please let me know how it goes!!!
DeleteThanks for sharing how to do this because I previously made around 30 hexagon EPP flowers and I’d hoped to make a quilt but sadly they were lost when I left my previous partner and he didn’t give me them or any else of my patchwork back 😢 I’m planning on starting up again but this time I’m going to make sure I get advice on how to finish it off before I even start.
ReplyDeleteI am so sorry your previous partner is such a jerk, and best of luck with your do-over!
Delete