
Here are some silk scrap Valentine brooches, which can also double as magnets, or greeting card decorations. They're very easy, you don't have to use silk, and, let's see, today's Feb. 3 - you have plenty of time to make them before the 14th!

When I tired of hearts, I made these:

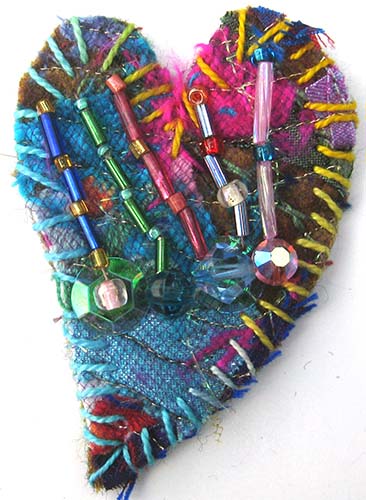
They look good without much embellishment:

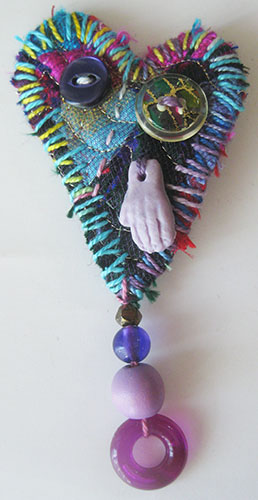
And better with much embellishment.


Do you HAVE to cover it with tulle? Yes, or your sewing machine foot is likely to get tangled up and create a nasty jam. Alternative: Water-soluble stabilizer, if you're willing to wash it away later - but be aware that when the stabilizer is washed away, if there is glitter or other tiny bits that didn't get stitched down, they will fall off. (Expensive alternative: Buy a felting machine. In that case, you can pound everything together without tulle.)
Once the tulle is on top, load the bobbin with a color that matches the backing felt, and use something decorative in top - I used a sparkly gold thread here, and did random echo stitching.

Back:


...if Jackson Pollack had had a career-ruining love affair with magenta. If you love it too much to cut apart, that's fine, just glue a piece of cardstock on back, address it, stamp it, and mail it as a postcard to yourself or someone else you love!
But if not, it's time to cut out your hearts. (I just cut them freehand.)

To finish the edges, on some of the hearts, I machine zigzagged with gold metallic thread. That looked fine, but what really gave the other pieces a wow factor was going around the edges with a variegated perle cotton, specifically, this one from Valdani. (I'm pretty sure this is M32 Jewels, size 8, on this page, no affiliation.)

If you're going to want to dangle something from the bottom point of a heart, drip a little fray check there and let it dry, just for extra strength.
After nine hearts, I branched out. I freehand cut paper shapes that would fit within postcard-size boundaries: A bird, a seahorse, and a crown. Pinned them on. (If you own cookie cutters, you can also use those as cutting guides.)


The back....


Sew a pin to the back, or glue on a magnet, and you're done!
Want more eye candy? Here's a bunch of wonderful and very professional pieces made with a similar process, but using decorative yarns and cords to create a sort of plaid: http://www.mcanaraks.com/brooching-the-subject/.
And some of my past freemotion quilted valentines are here.
My pattern booklet for making ocean creatures - especially octopii, fish, sharks, and more - along with detailed directions for making the brooches is available on my Etsy shop, here.
Wishing you a sweet and creative Valentine's Day!
enjoyed that, thank you!
ReplyDeleteMost wonderful Valentine post - thank you!
ReplyDeleteGlad you enjoyed it, Anneliese, thanks for the comment!
ReplyDeletevery creative looks like fun
ReplyDeleteThanks, O, they were fun!!!
DeleteThese are really nice. It makes me want to go right to my studio and play.
ReplyDeleteGlad you enjoyed them, Beth, that's the idea!
DeleteVery fun, Cathy. Good tips too!
ReplyDeleteThanks, Gail!
Deleteso wonderful! Texture, color, shape!
ReplyDeleteGlad you enjoyed it, LeeAnna!
DeleteLoved this post, thanks for sharing.
ReplyDeleteKathy
Thanks for the nice comment, Kathy!
Delete