Need a fast holiday gift? How about turning your favorite museum art photos into mini-quilts?
Before:

After:

UPDATE!
Backstory:
Do you take a ton of photos at art museums? I sure do, because I see so many art lessons, about color, composition, creativity, and courage.
These photos are fun to revisit from time to time, but not much happens with them.
Until a couple of weeks ago, when the Notre Dame Cathedral was reopened, five years after the horrific fire.
Days before that fire, we were visiting Paris, including Notre Dame. (I blogged about it here.)
We also went to the Louvre. We had no plan, but wound up spending a lot of time in the 15th-19th century French painting galleries (blogged here.)
One of the dozens of photos I took was this. Titled "Rinaldo in the Garden of the Palace of Armida," it was painted by Rococo artist Jean-Honore Fragonard, circa 1763.
It's an over-the-top decadent scene, which is the point of Rococo. On the right, nubile, pale women are escorting a soldier (You can tell by his massive golden helmet, adorned with...feathers? Do the feathers make the enemy laugh so hard that they're immobilized?)
On the far left, another tantalizing pale women emerges from a cave to look on.

At first sight, I admired the pastel palette, which I almost always avoid. Pinks! Yellows! So not my thing, but, WOW! I also loved the fluffiness. And the artistic skill here is fantastic; so few strokes convey so much, especially semi-transparent drapery. Fragonard is the man!
So thinking about Notre Dame two weeks ago got me looking at my photo of this painting, and that got me doing a little research.
The soldier -- Rinaldo -- was a Crusader, and his troops were about to invade Jerusalem. But a witch named Armida (I assume that's the gal on the far left?) wanted to stop the invasion, so she kidnapped him. She took him -- in her magic chariot -- to her magic garden, where she planned to kill him. Instead, she fell in love with him; he never returned to war and they lived happily ever after.
This ostensible history was told in an epic poem called "Jerusalem Delivered," by Italian writer Torquato Tasso, published in 1581.
The story was performed as an opera in Paris in 1761. Historians postulate that Fragonard either attended or heard about it there.
I decided to celebrate this piece, and learn from it, without stressing myself out. I did a cross between copying and riffing.
Step 1. I started out with a 9" x 7" piece of stiff interfacing (I like Peltex) with the fusible side up (or use two-sided fusible interfacing and put parchment paper on bottom when pressing).
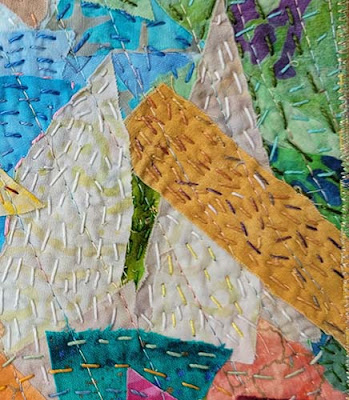
Step 2. Start cutting triangle-ish pieces -- I was going for a "low poly" look so I picked triangles. (You could choose rectangles, ovals, hexagons, or anything). I used batiks for a painterly effect, and tried to approximate colors and shades, and location. Studying the painting closely to do this is where I learned the most, including understanding the artist's composition and how he created the two focal points, with the white-skinned people and Rinaldo's sash.
Step 3. Keep adding fabric until all the interfacing is covered. Fabric pieces will overlap. If the fabric isn't touching the fusible on the interfacing, use a glue stick to adhere it.
Step 4. Press everything in place. The hot iron will also dry any glue.
Step 5. I first machine-stitched about 13 diagonal straight lines across the scene, at 3/4" intervals. This held everything in place a little better than just glue and fusible. These are light-colored lines of stitching that you can barely see in the photos.
Step 6. The most fun part: hand stitching. I used embroidery floss and added long stitches to mirror the implied or actual detail lines and brush strokes of the original. Since this is a small piece, I think I did all the stitching in about 2-3 hours while watching tv.
I used a lot of variegated embroidery thread skeins. On Rinaldo's gold sash, the browns and golds are from just one thread. (The white thread on the pale people is not variegated).
Step 7. I glued/fused a piece of fabric to cover the back.
Step 8. Trim all the edges even and straight. Then I did a corded edging, something close to a satin stitch all the way around, with metallic gold thread on top and in the bobbin, enclosing a gold embroidery thread as "cord". (If you look up "corded edging" you'll find it's easy to do and helps make raw edges like this neater than just doing a satin stitch without a "cord.")
Then I went back to my original picture to study the frame. The painting's golden frame is almost as over-the-top as the painting. I figured I could get that effect with lace. First I auditioned white lace....
Definitely not -- the frame is now competing with the white figures, who are the focus of the painting. So I decided to paint that lace gold, same as the actual frame. I used acrylic Lumiere paint, mixed with a bit of fabric medium. (Any acrylic paint should work, and if you add fabric medium it will thin it a bit.) I first let it dry bumpy like this, and basted it in place, but I didn't like the look; The ruffles drew too much attention.
So I undid the basting, pressed the lace as flat as I could, and resewed it in place. I like it much better this way. 
And that's my happy-ish ending! True, now I think my figures look like Halloween ghosts (or, much worse, KKK refugees? Oh no!!! Too late for me to fix that!) But it's still a relatively happy ending, compared to that of Fragonard, who, in hindsight, had picked the wrong clientele. Along came the French Revolution, and most of them were executed. His work was ignored for years, before he was rediscovered. I hope he's looking on and forgives me for my lazy, yet respectful tribute to his work. He opened my eyes to new composition, focus, and color ideas! Merci, Jean-Honore!
UPDATE (12/27/24): My kid (who is an artist) saw this piece and decided it needed something more. So they added jewelry! That's the photo you see at the top of this page! Now we're talking serious Rococo!


