Showing posts with label Buttons. Show all posts

Sunday, April 7, 2024

Four Windmills, 55 Years

Ever since moving to Southern California 30 years ago, I have marveled at the region's windmills, especially the miles of them between my Los Angeles home, and the "Road to California" quilt show in Ontario, CA, that I visit annually. They look like this:

Sometimes they spin in unison, sometimes out of sync, but they always make me happy, a majestic miracle of alternative energy. 
In February, when I was playing with a raw-edge fabric-covered-with-tulle technique to make Valentines, I thought of those windmills and decided to make some. I pulled all the pieces from my batik scrap bag.
The highest scrap was a failed experiment with stamping circles of gold paint on fabric. (below, left). The planet on the far right is a different piece of batik. 

For the centers, I used decorative buttons, because: Why not?

A friend saw this on my Facebook page, and bought it for a friend of hers who works in alternative energy. I was thrilled, but sad, because now, I thought I didn't have a windmill quilt!

So I made another one. This has fewer windmills, and instead of buttons, I sewed hex nuts to the centers. 
Then it occurred to me that hex nuts are probably the last thing you want holding rotating blades, because they will unwind eventually, right? But I didn't want to take those nuts off, because they're so darn cute! 

And it wasn't until after I'd finished the piece, that I remembered I'd made windmill-themed fiber art more than 50 years ago. This thing has been lying on a bureau in my bedroom for so long that I almost never notice or think about it.  (Note what's happening in the upper right corner when I tried to photograph it.) 

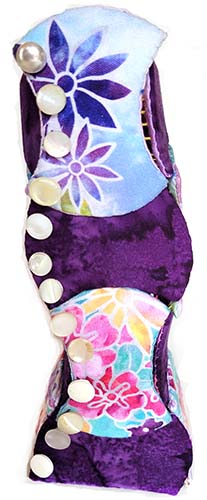
It's felt and embroidery thread, made from a kit, in the 60s, when I was in elementary school. I cut the pre-marked shapes out of the felt, and followed the stitching directions, which included zigzagging leaf veins, and square stitches for the windmill blades. It's clever and adorable, and none of this was my idea -- I just followed  directions, which is how so many of us begin our fiber art adventures!

After I finished it, it followed me around. I found it in a box and laid it out in my bedroom a couple of decades ago.  

So after making the quiltets above, I noticed it again, with new eyes, and decided to take its picture. My grandcat loves when I get laser-focused on taking a decent photo, and as you can see, she wants to help. 

So not only is this piece worn by age, sun, and never having been washed, but now it's also embedded with cat fur.

And now, I thought, I own TWO windmill fiber art pieces. But wait, there's more! Writing this blog post I remembered I had  another windmill, in my quilt "Nonsense Town," which is only about year old.

It's in the top row, center. 

It's sort of a cross between the Dutch technology in my Sixties sampler, and the sleek newfangled California model. Newsflash: This windmill, on this quilt, is now a puzzle on The Quilt Show, because of my recent episode! Find the puzzle here

So now, if any one happens to ask me, "What is the recurring lifelong theme of your quilts?" instead of answering, "Um, I'm not sure, probably nuthin'," I  have a concrete answer: "Windmills!"

Was a sampler your first fiber art? Do you still have it? Have you taken its picture?

For more about the relaxing confetti-raw edge applique technique, go to https://gefiltequilt.blogspot.com/2024/02/stress-relief-with-confetti-valentines.html

Sunday, April 2, 2023

From Apple Core Template to English Paper Pieced Bridal Vase

I'm been playing around with turning flat quilting templates into 3-D constructions. Here's one of my new experiments

It's 8" tall. I think it's a spinal column vase, and it started with a 2.5" template acquired years ago. 

Longtime quilters recognize this as a classic apple core shape. Google "apple core quilts" you'll find books, patterns and kits to make scrappy quilts with hundreds of pieces this shape. Especially "charm" quilts, with a different fabric for each piece.

The results are definitely charming - but never charming enough for me to want to make one. Because of the curves, you have to do a lot of scary clipping on inside seams, and precision sewing.  

But the novelty factor drew me to that template a couple of weeks ago. The great thing about making small projects like vases (as opposed to quilts), is that you only need to make a few of the same shape, rather than hundreds! 

I start by cutting out the shapes from an old cardboard mailer. I taped pieces together, and played. Here are two  candidate formations: 

I still wasn't sure where I was going when I started making fabric versions. I pulled gorgeous prints from Michelle Freedman"Fire and Ice" collection from Maywood Studios. (Michelle is a fantastic designer; find her quilt patterns at https://linktr.ee/stitchwellandprosper)

I cut 12 apple core shapes out of stiff interfacing with fusible on one side. I cut an oversized apple core shape out of the featured fabric.  I placed it face up on the non-fusible side of each interfacing shape. Then  I wrapped the seam allowances around  to the back, and fused them in place there. This required a whole lot of scary clipping at each piece's waist line.

On the reverse side, I essentially needle-turn appliqued the "lining", to cover the raw edges that came over from the featured side. Again, abundant clipping.

I made six with Michelle's fabric on the featured side; plus 6 more pieces with a dark purple batik.

(In my polyhedron-making book at the bottom of this post,  I make all sorts of bowls and brooches, and more this way; but all those shapes have nice straight sides - hexagons, octagons pentagons, etc. - no clipping required.) 

I experimentally sewed the pieces together with embroidery floss and large stitches, doing what English Paper Piecers call the "flat back stitch." I figured I could  go over it later to replace the big stitches with smaller ones. (Spoiler alert: that's not going to happen until this thing falls apart!)


The cardboard model showed me that I needed the base to be flat; otherwise the vase would rock! So I cut the four pieces on the bottom row (in the photo above) in a straight line before covering them with fabric. 

I brought the last edges together, and here we are. It not only reminded me of spinal column, but a curvy person...in a corset...of a bridal gown...bridal buttons leapt to mind, so I sewed small vintage shank buttons down one edge.


You can't see them from the back. 


This is all trial and error! Before I hit on the vase, I strongly considered a bracelet. Flat, it would look like this: 


Which also reminds me of a spine. And in a circle, minus one piece, you'd wind up with this cuff (Imagine it without the binder clips. Although if I could find sterling silver binder clips, they could be a feature!) 

If you're interested in learning my technique for covering (much easier, straight-line) interfacing shapes and using them to make interesting containers of all sorts, check out my newly updated book, "Stitch-a-hedron; English Paper Pieced Polyhedron Gifts and Accessories to Sew," available as a digital pattern in my etsy shop, here, and also soon on Connecting Threads! 


Monday, November 23, 2020

Pandemic Porch Quilt Show Day 34 - 35: My Two Weirdest Quilts in Two Days

Day #34: Blooming Cactus
Choosing an eye-pleasing color palette did not come naturally to me, and here's the evidence. Let's breathe slowly as we approach this bed-size quilt, so as not to trigger sea-sickness. 
It's slightly less terrible when you get very close,  thanks to the blue oasis. 
Longtime quilters will recognize this pattern immediately, as a Blooming Nine Patch, from the bestselling 1996 quilt book 'Traditions with a Twist' by Blanche Young and Dalene Young Stone, still widely available (used) online - and sooooo worth it, just for this one pattern. 

Sure, I knew that the orange and brown were awful, but I believed I was on a mission to prove ugly fabrics could be beautiful. Specifically, I wanted to redeem this crackly orange and brown batik, which I cut from a designer hippie halter-top-and-bell-bottom set that my extremely stylish mother wore in the 60s or 70s  (probably purchased at Filene's Basement, in downtown Boston). 

In hindsight, this fabric is irredeemable. (Except: As a faux Halloween pumpkin.)

The fabric I most love on this quilt is near the center, and also on the back - an African wax print. It looks really great when not in eyeshot of brown and orange.

But despite the chaloshes (terrible) colors, I learned more from making this quilt - as a new quilter - than any other quilt. Specifically, I learned how much fun it is to make gradual color and value shifts that create movement across the quilt. I still find this activity utterly thrilling (especially because I now use better colors.) 

The print that follows the halter top, and that forms the appliqued flowers, was cut from a different garment, a batik Indonesian shirt. The outermost blue fabric (which is also in the center of the quilt) is an American cowboy sky-themed fabric. The international diversity of these fabrics makes me laugh! 

And no quilt is complete without buttons. (They're in the middle of the flowers.)
Whether you use ugly or beautiful fabric (and today I courageously recommend the latter), planning a Blooming Nine Patch takes you straight out of your left brain, and deposits you happily into the other side. I had such a ball working through the color shifts, that I felt like I could make nothing but Blooming Nine Patches for the rest of my quilting life and be perfectly happy! 

Day 35: Necktie Archeology, 80" x 99"

Poundwise, this is my heaviest quilt, and one of my longest. My porch ceiling isn't high enough - in the photo above, the bottom of the quilt is folded on the floor. It holds 68 appliqued neckties, most intact, plus a whole lot of vintage buttons, all dating from the 1950s to today. They were gathered over many years, from flea markets, thrift shops, friends and relatives.
On the right side of the quilt they’re chronologically arranged, from bottom to top. The oldest necktie, a sleazy narrow grey number which runs horizontally along the bottom, features a bathing-suit clad pinup girl hidden in the lining. I think it's from the late 50s - but one viewer told me that it could be a reproduction (Google it - there are lots of old pinup girl neckties, as well as reproductions, sold online.)
Above that come the 1960s ties, with ultra wide psychedelic paisleys;
Then upward to novelty neckties: Elvis, the Wizard of Oz, a giant trout, beer, photography, golf course, space shuttles, warplanes, Forbes Magazine, laptop computers, Tabasco Slurpees (?), and so much more. My favorite tie is the brown and gold “how to tie a tie” tie that I wove vertically through the middle.
In the lower left of the quilt - as a nod to the tie’s role as a phallic symbol - I placed the neckties related to love, sex, marriage, obstetrics and babies - including in the center, a blue-and gold necktie with the word "Viagra" repeated on it, again and again. (Presumably that tie has extra interfacing.)
Almost all the ties on this quilt are intact, and sewn in place with relatively large stitches. I did move most labels from the back to the front (on the narrow end), for documentation, but other than that, in theory, someone could cut the ties off, steam them, and wear it! See more photos in my blog post, here. This quilt is looking for the right home, ideally with a passionate necktie afficianado, who has at least one blank, strong, high wall, and it's on sale for only $4000 (negotiable, I'll throw in shipping!)


Friday, October 23, 2020

Pandemic Porch Quilt Show, Day 20: Rolling Pansies

I made this quilt in the 90s, finishing the work of an unknown quiltmaker.

It started as a flea market find: a metal cookie tin, full of petals and leaves. Many petals were beautifully turned under with a lovely, even basting stitch in thick white thread. I couldn't bear to take the maker's stitches out, so I left them in place whenever possible.

This "pansy" is a traditional quilting motif, from the 1930s I think. The fabrics - primarily calico florals - look like they're from the 1960s. Each flower has six components, 5 petals, plus one leaf. The thoughtful quiltmaker, perhaps knowing that she couldn't finish , put one sample block in the tin, with the components basted in place on a sad square of browning white muslin.

Clearly, something more cheerful was needed. I went for broke and took quilt guru Freddie Moran's priceless advice to treat red as a neutral. I hand appliqued each flower to a red square. After quilting, I surrounded each flower with white buttons.

The quilt was lightly hand-quilted. We used this quilt often, on beds and couches. I occasionally had to re-secure dangling buttons. A few months ago, to strengthen the quilt, I machine quilted red swirls in each block's corners.
The sashing is a vintage floral plaid, also from the flea market (but not with this project).
I liked the topsy-turvy energy generated by the plaid lines shooting in all directions!
Many more quilts from my porch show are coming! 

Thursday, July 2, 2020

Masked Hexagons, Part II: A English Paper Piecing Variation

Help!

I'm going nuts making masks! 
These are a few of my new masked hexagons, made from the scraps of face masks I've been sewing since March. In my last installment, here, I described how I made these hexies, using conventional English Paper Piecing techniques. At the time, I had only made about 35 hexagons. 

Since then, I've made many more masks to donate. So here's the finished quilt, with a total of 79 masked hexagons, all socially distanced. 

UPDATE: The digital pattern for this quilt is now for sale on Etsy, here. All money raised from this $1.99 pattern will go to my Los Angeles Regional Foodbank fundraiser, here

Here are some of my new favorite masked hexagons. The "faces" are cut from assorted solids; and the "mask" prints are from my vast stash of mostly novelty fabrics that I used in actual masks. Here's a bit of casino fabric that a friend gifted me.
The (mostly) round button eyes give them a startled look, appropriate for a pandemic. (Pandemic Pat?)

While making masks, I discovered that I own TWO radish fabrics. 

And numerous cat fabrics. This cat looks bored. 
Mighty Mouse intends to triumph over covid. The patriotic buttons almost look like eyes with red-and-white eyeshadow.

The red vintage paisley below is only nice in small doses.
Yes, that's matzoh fabric. 
Rainbow triangles go with everything.


A dandelion print reminds me that things more benign than viruses can blow in the wind.  
This awesome fabric features quilters' rulers:
Harry Potter is recognized universally as a symbol of meeting catastrophe with a great deal of anxiety (but triumphing anyway).
A truly horrible brown rose print made a remarkably nice mask for a hexagon. 


Bars - horizontal, or on an angle - keep the hexagons socially distanced. 
This next fabric -  the star - was from a print featuring Spongebob.  
A 1970's era flannel. So soft  and comfy. 
For quilting, I surrounded the masks with quilted covid viruses, and hypothetical pathogen-laden swirls


On the white area, I made more emanations
Again, the digital pattern for this quilt is now for sale on Etsy, here.
For a much simpler version of this quilt on a smaller scale, check out my previous post, here


Of course, I have hexagons and English Paper Piecing on my mind because my new book was just published by Landauer, Hexagon Star Quilts: 113 English Paper Pieced Star Patterns to Piece and Applique, available from Amazon (here) and wherever fine quilting books are sold! 
My mask-making resource page is HERE. Find my simple pleated mask pattern HERE. My roomy mask pattern is HERE