Showing posts with label Tutorial. Show all posts

Saturday, February 10, 2024

Stress Relief with Confetti Valentines and Non-Valentines

 I was minding my own business, making a whole lot of improv triangle kaleidoscopes, like this.

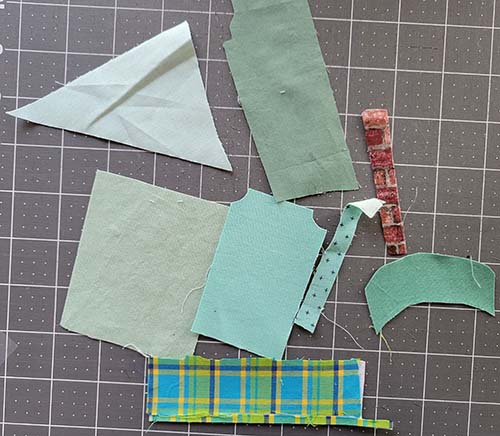
I'm only using solids for this quilt. The smallest scraps were filling my "toss" bin.

But then the Create Whimsy newsletter arrived in my email. Lynn Woll, its curator extraordinare, had an article titled "Scrap Happy Confetti Quilts," with  Valentine's Day projects. Oooooo! It looked like so much fun...and I knew I had loads of fresh scraps. 

I plucked the solids from my "discard" bin and sent them into plastic bags, organized by color. 

Then I cut out a 4" square of fusible mid-weight interfacing (Pellon 809/Decor Bond), and started placing bits on them. Lynn suggests laying out squares of interfacing, fusible-side up, then adding a layer of mini-squares, working inward from the borders. That was too slow for me. I used lots of bigger shapes. A top of layer of tulle, to hold everything in place, is an option. I liked the way it looked with a square of purple tulle from my stash. The last step was machine stitching a grid.

That was good practice for the next one, more of an attempted Valentine. 
The blue is a batik, the orange piece on the far left is a tiny print; the rest are solids. I placed white tulle on top, which cut the intensity. I think this piece sends the message, "Although I love you, while wearing pink I was in a bloody duel with golden swords, and now my heart is sore and broken."  In other words, I can't think of anyone I actually want to send this particular (inaccurate) emotion to. (My clever friend Jane suggested it might work as a remembrance of the romantic Valentine's Day massacre.)

For my third try, I went for a design that's tough to ruin: Tree. I accidentally laid the 4" interfacing square down upside-down, so NONE of these pieces were secure! 
I didn't want to move them all to a different piece of interfacing, with fusible facing correctly up; so I just left it like that. I fused one more layer of Decor Bond to back. The extra layer turned out to be helpful for stabilizing the piece during stitching. 

Still, nothing was glued in place, so I had  to cover this one with tulle, too. First I tested white tulle. 
Too pale. So I switched it out to the leftover purple tulle. Much better, richer color.
(The moral of the story: Test different tulle colors.)
Instead of a grid, I did some contour quilting, switching thread colors for different areas.
(Note: the bottom red stripe is a piece of an antique kimono that happened to be on my work surface left over from a different project!)
I trimmed it to a slightly smaller square. But there were still blank spots (where I accidentally left white/interfacing showing) around the edges. So I trimmed even more, cutting curves. 
Finally, I edged it with variegated threads.  
Here's the back. In hindsight, I should have put a layer of fabric on the back before the stitching.
Then I realized that it was shaped exactly like toast. And what could be more romantic for Valentine's day than a scrappy toast-shaped tree scene? (That's a rhetorical question.)
More fun with tulle, trees, and love are in this blog post. Click on the words "Valentine's Day," and/or "tulle" in the word cloud on the lower right for even more.
Find the Create Whimsy article here. Please sign up for my newsletter, too, here. Lots of big news is coming soon! 


Wednesday, March 15, 2023

Quilty House Portrait: A Labor of Love

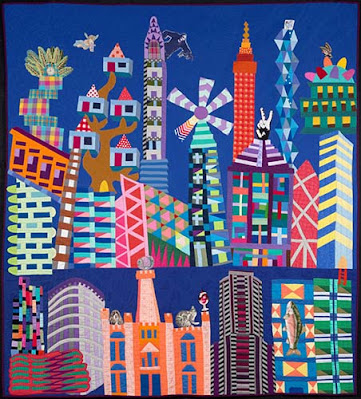
I've made a lot of cityscape quilts, and I always have a blast doing them. Here's one, "Nonsense Town." 
And here's a closeup of some of the buildings. Let's look at that orange one. 

With a single plaid, I suggested zillions of windows. The other buildings, similarly, have relatively few pieces representing hundreds of windows.

Below is an even simpler example, a potential skyscraper made from two print fabrics. It would take 4 minutes to cut out and sew together. The darker perspective side gives it a nice dimensionality. Modern skyscrapers require so little time to represent so much living/office space.

And here's a 14" pillow I just finished for a dear friend, who I've known since 2nd grade, portraying her charming childhood  home. This took freaking months.

We started with some old photos, including this one: 
Online, we found more photos, though none with a good head-on view....
She also sent me a lovely sketch that a friend had made 40 years ago. Unfortunately for me, the artist  opted for geographically-accurate foliage in some of the trickier areas, perspective-wise, so it didn't give me a lot of guidance.
I came up with my first draft of a pattern by tracing the dark, ancient photo, with her standing in front. (The disruptive lines are the tree.)

I wanted to include her, but she nixed that. So, after several drafts from several angles, here's the simplified drawing : 
(I moved the tree. It ended up disappearing completely.)

The tracing and drawing was done in my graphic design program, CorelDraw (but you could do this all on paper). Then I upsized it to about 14", which required four sheets of letter-size paper. I taped them together, taped the whole thing to a window, and started tracing pattern pieces. 
I traced every element of the house onto a new piece of paper. I cut them out, flipped them to the back, and traced them onto the back of paper-backed fusible web.  Here are just a few.
We also had to work out the colors. Since computer color is unreliable, I sent her to the hardware store to look at paint swatch cards. She sent me 8 of them, with notes. 
From those I picked a palette. Most are solids, but there's a faux red brick novelty fabric, and the plaid on the bottom represented the grid under the porch. I chose pieces a little darker because I knew the house would need contrast for its many different sections to show. 

My friend had some more specific requests. She wanted a Dutchman's Pipe on the porch, and since I had no idea what that was, she sent me photos.

Layer by layer, I traced each piece, cut it out, and pressed it in place, on top of an applique press sheet. When everything was just barely fused in place, it was time to choose a background. I set the house on a couple of different candidate skies and took photos to send her. This one's dramatic...
 
But perhaps a little bleak; good for a Wuthering Heights pillow. 

I liked this one, but the batik didn't really go with the flat house colors: 
 
I liked this rainbow/unicorn sky, and my friend is a very colorful person. 
And more. The one she selected was also my favorite, with puffy white clouds. I think it gives the house a dreamlike quality, appropriate for a nostalgic memory project. 
After fusing the house onto the large sky square, I stitched everything in place, using a machine satin stitch, or, for the tiniest pieces, straight stitch (like the dark strips of the porch railing). 

The windows needed panes - I hand-embroidered those with white pearl cotton, using a backstitch.  I also hand embroidered the heart motif in the top red triangle, and the other red trim areas.  
 
I called my friend to find out what color her doorknob was and what side of the door it was on. For that, I used a vintage metal shank button.  She also mentioned the mailslot on the door, which I hadn't seen in any photos, so that was a last minute addition.
And she requested a lilac bush on the left. 
The lilac blooms and bush were cut with pinking shears, fused in place, and then freemotion stitched. I chose a fantasy aqua color because a more botanically-accurate dark green was in the house on that side.

So speaking of fabrics, how many separate cut, fused and stitched pieces would you guess went into this house? I'm counting around 70, not including the background sky. 

(There's one more fabric on the pillow's back, a different sky, because I ran out of the puffy cloud fabric on front. The  pieces are overlapped, with hook-and-loop tape holding them in place.)
This project was a labor of love. It made my dear friend very happy, which was the point. I learned a lot that will be very useful. But it does leave me with a burning question for you and me: If a client (who was not a lifelong friend) wanted a 14" pillow with a portrait of their gorgeous, detailed, gingerbread-style home, how much would you charge? 


Interested in portraying much more real estate, much faster?  Check out my new book, "Quilted New York; Celebrate the City in Color and Fabric," at https://cathyperlmutter.com/books-and-patterns/


Thursday, July 2, 2020

Masked Hexagons, Part II: A English Paper Piecing Variation

Help!

I'm going nuts making masks! 
These are a few of my new masked hexagons, made from the scraps of face masks I've been sewing since March. In my last installment, here, I described how I made these hexies, using conventional English Paper Piecing techniques. At the time, I had only made about 35 hexagons. 

Since then, I've made many more masks to donate. So here's the finished quilt, with a total of 79 masked hexagons, all socially distanced. 

UPDATE: The digital pattern for this quilt is now for sale on Etsy, here. All money raised from this $1.99 pattern will go to my Los Angeles Regional Foodbank fundraiser, here. 

Here are some of my new favorite masked hexagons. The "faces" are cut from assorted solids; and the "mask" prints are from my vast stash of mostly novelty fabrics that I used in actual masks. Here's a bit of casino fabric that a friend gifted me.
The (mostly) round button eyes give them a startled look, appropriate for a pandemic. (Pandemic Pat?)

While making masks, I discovered that I own TWO radish fabrics. 

And numerous cat fabrics. This cat looks bored. 
Mighty Mouse intends to triumph over covid. The patriotic buttons almost look like eyes with red-and-white eyeshadow.

The red vintage paisley below is only nice in small doses.
Yes, that's matzoh fabric. 
Rainbow triangles go with everything.


A dandelion print reminds me that things more benign than viruses can blow in the wind.  
This awesome fabric features quilters' rulers:
Harry Potter is recognized universally as a symbol of meeting catastrophe with a great deal of anxiety (but triumphing anyway).
A truly horrible brown rose print made a remarkably nice mask for a hexagon. 


Bars - horizontal, or on an angle - keep the hexagons socially distanced. 
This next fabric -  the star - was from a print featuring Spongebob.  
A 1970's era flannel. So soft  and comfy. 
For quilting, I surrounded the masks with quilted covid viruses, and hypothetical pathogen-laden swirls. 


On the white area, I made more emanations
Again, the digital pattern for this quilt is now for sale on Etsy, here.
For a much simpler version of this quilt on a smaller scale, check out my previous post, here. 


Of course, I have hexagons and English Paper Piecing on my mind because my new book was just published by Landauer, Hexagon Star Quilts: 113 English Paper Pieced Star Patterns to Piece and Applique, available from Amazon (here) and wherever fine quilting books are sold! 
My mask-making resource page is HERE. Find my simple pleated mask pattern HERE. My roomy mask pattern is HERE.