Showing posts with label templates. Show all posts

Sunday, January 23, 2022

My First Tumbler Quilt! (Not Tumbling Blocks)

First, in case you are as confused as I was, a "Tumbler" quilt is  completely different from a "Tumbling Blocks" quilt! 

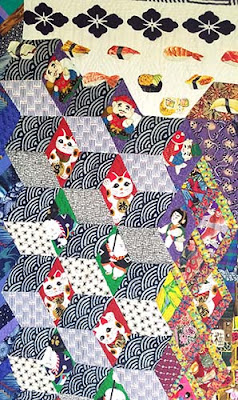
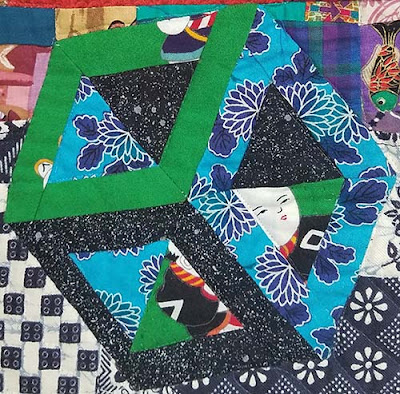
"Tumbling Blocks" are made from 60 degree triangles and diamonds, and wind up with a 3D effect. They're great fun to look at, but technically can be a bear to make. I don't even remember how I pulled off the blocks below, from a Tokyo-themed quilt I made in the 90s, called "Sushi in the Sky with Diamonds." 

I must have had a much higher tolerance for mitering in those days. On that same quilt, I also threw on some hollow tumbling blocks, carrying little passengers cut from Japanese fabric. 

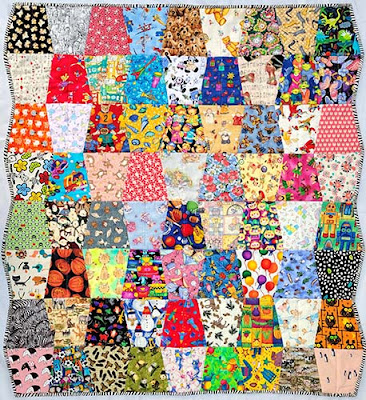
But in three decades of quilting I never made a much easier-looking "Tumbler" quilt, whose patches are shaped like - guess what kind of glassware? 

Until now! Here it is. Made as part of my emergency response to the massive baby tsunami happening among my family and friends since the Covid era began.

What made this quilt possible was a wonderful craft thrift shop, Remainders, in Pasadena, California, which has every kind of fiber art notion from the past 50 years. Remainders sells them at such reasonable prices that if I don't like it, I just donate it back to them to sell again! It's like a lending library of sewing stuff!

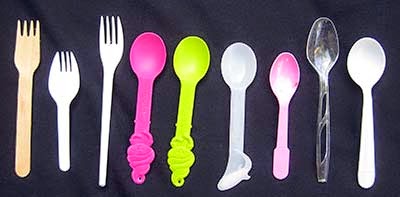
Specifically, I found this:

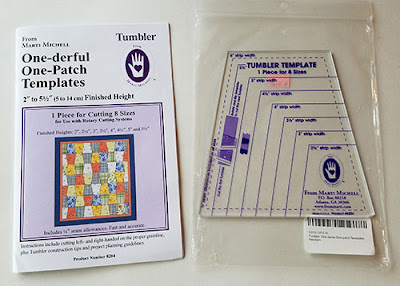
It's Marti Michell's "One-derful One-Patch Templates" They're $23 new at Joanns, but half that price at other retailers (which makes the price only a few dollars more than I paid at Remainders.) 

You may ask, "Why would I need to buy a Tumbler template when I can perfectly well cut a tumbler shape out of a Cheerios Box?" And I asked myself the same question. Then I tried it, and my newly-educated answer is, "This template rocks!" 

First, it's thick acrylic, so unlike a cereal box, you won't trim it with each piece you cut. Second and more mysteriously compelling: The template has these two little jogs in the lower outer corners, on the wider end. Look closely at that bottom right edge in the photo above - the template is not quite straight there. 

When you cut the shape with these slight extra angles, they piece together much more cleanly than if they didn't have the extra angles. If you understand why, please explain it to me!

UPDATE! Several alert readers have explained it to me - Tumblers have strange little dog ears. Reader mary greene (who doesn't capitalize her name) sent me to this tutorial by Nancy Zieman. If you scroll down to the section titled "Construction," the third photo below that subtitle, you see the tiny dog ear on the bottom right that's created if you don't have a shaped template. Because Michell's template has you trim that first, the pieces' alignment is less confusing! By the way, mary has a hilarious blog, where her favorite post is "Two Dog Shirts for 50 Cents," here

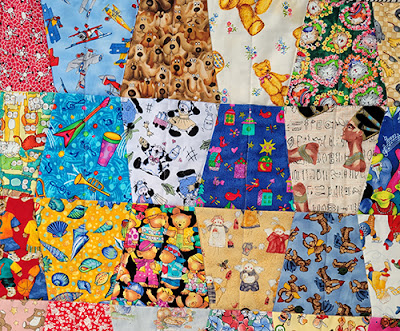
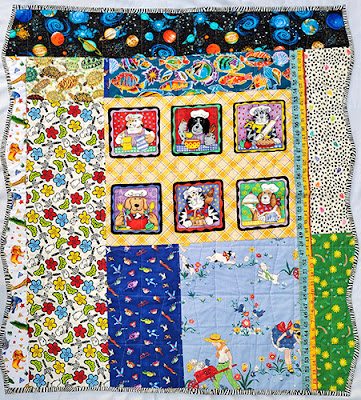
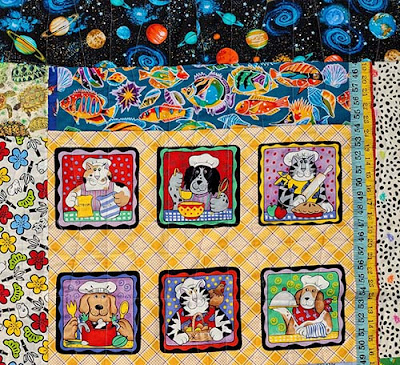
I also found many of the fabrics for this quilt from Remainders,  of course supplemented them with pieces from my own exhaustive, exhausting, library of novelty prints.  

I debated whether to include popcorn (upper left in photo below), since it's a baby choking hazard, but hopefully by the time the baby is old enough to comprehend a picture of popcorn, they will be old enough to safely eat some. Also, the parents could lie and claim they're floating yellow teddy bears.

Every baby quilt should include mooses (above left).
Below, the back. I like putting fabrics that I don't have the heart to cut up into small pieces on the back.
I decided to give the back an astrophysics, fish and pet theme. 

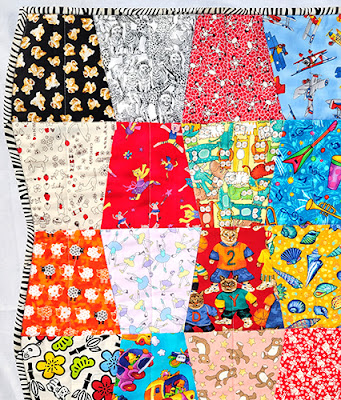
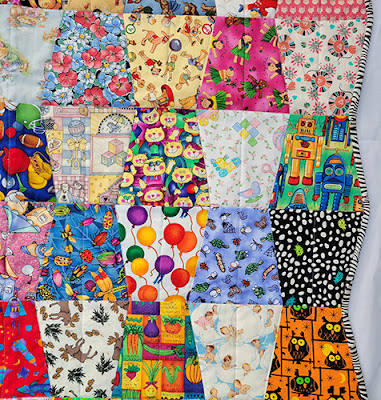
My great debate with myself with this quilt was whether to leave the sides zig-zag, or cut the edges even, thereby losing half of each outer side row. And speaking of pets, my grand-cat assisted me in scrutinizing this important issue closely.

I finally decided to leave the zigzag sides. I cut the binding from bias. At the four corners, I turned the bias the exact same way as for a regular 90 degree corner. And for the gentle ins and outs on the sides, there was no need to take the quilt out of the machine. Just stop on each outermost and innermost point, needle down, and swivel to the next direction, turning the bias along with the rest of the quilt. It's surprisingly easy! 

Tumbler quilts do take a little more time than square-based baby quilts - but with a sturdy-yet-mysterious Marti Michell template, they're relatively fast and a lot of fun. (No financial affiliation). I'll hold onto my new favorite template for a while and see what babies come along next! 


Sunday, September 20, 2020

Turning Lines Into Circles for Curved English Paper Piecing

What do these English Paper Pieced blocks from my new book, "Hexagon Star Quilts," have in common? 
Answer: They're all straight lines. I've always been curve-averse, and although I've done plenty of English Paper Piecing in recent years, almost everything I've made with the technique has had straight lines only.

But quarantine is an opportunity to try new things (assuming you don't have an essential job, young children, and/or a sourdough fixation). So a couple of weeks ago, I plunged into curved EPP in a big way. It turned out to be mostly easier than I feared, but with a few trickier situations. 

In fact, I have a new name for curved EPP: Extreme Paper-Assisted Applique. Because using freezer paper and/or cardstock to create and applique curved shapes is almost the same as English Paper Piecing, except the latter is harder to do accurately.

If you're pressed for time, here's my conclusion about curved EPP: It's doable, but recommended only for blocks that have relatively few curves.  

Here's how I did the research that led to this conclusion. I didn't have any curved block patterns, so I picked star patterns from my book to translate into curves, starting with this block, Star #91.  

Here's my original piecing diagram:

I replaced the small central square with a large circle, and turned the outer hexagonal edge into a circle too. Result:


I grew it from 6 to 7", cut out all the pieces, basted fabric around them, and stitched them together. I used the flat-back stitch, which I found quite easy. 
And - ta daa - here's the front. (That wrinkle will go away, it's not an actual pleat.)
It's okay, but far from perfect - especially at the light star points, where dark blue pieces are supposed to meet. If I'd appliqued the green star and red bars on top of a blue circle, it would have been faster and more accurate, and there wouldn't be the tiny, thready gaps and unevenness at the edges.

Next, I printed my pattern for this block from my book, Star #98.
 
I simplified it, replaced the central hexagon with a circle, and also converted the outer edge to a circle I rounded off all the triangle tips. I sewed the basted pieces together by machine, from the top, with monofilament thread. Here's the back:

And the front. 
Could be much better. Once again, the narrow tips of the dark blue pieces - where they curve around the light lavender petals - was challenging, and I didn't entirely succeed. The underside of the blue fabric is showing at the edges. Again, simply using freezer paper or needle-turn applique and layering the pieces on top of a blue circle would have been faster and neater.

Finally, here's a block that started as a straight-line six-pointed star. I deliberately created gentle curves that I thought would be easy to piece. 

And once again, it's okay, but not okay enough. The gaps and bumps at the edges just couldn't be filled.

Summary of findings:

 1. The basting part of curved EPP is just about as easy as straight line basting. You can pretty quickly get the hang of distributing seam allowance pleats neatly around concave curves, and and clipping seam allowances to make smooth convex curves. 

2. Setting shapes around a central circle is much harder than surrounding a straight-edged shape (like a pentagon or hexagon.) Not because of the curve - it's because a circle doesn't show each piece's starting and stopping point. This creates a challenge in deciding what order to join pieces, placing them in exactly the right position, and distributing the fabric evenly with necessary precision. 

 3. The flat-back stitch is ideal for joining curved pieces. In fact, I can't even figure out how you could join curved edges with a traditional EPP right-sides-together whipstitch. Biggest flat-back drawback so far: I have to check the front frequently to make sure I don't accidentally stitch dog ears into the seams. (Which I did, Twice.)

3. A machine zigzag from the top works beautifully with curved piecing. 

What did I wind up doing with my imperfect curved EPP blocks? I combined them with actual appliqued blocks, and set them into the side borders of this "Frankenquilt" - my oldest UFO, finally finished.
Here are a couple of closeups. For more about this quilt, go to my last post, here.
If  you want to try flat-back stitching and curved paper piecing, Mr. Domestic has a nice tutorial on youtube here

If you're interested in my book with 113 English Paper Pieced stars - all straight lines - find more information on my blog here, or on Amazon, here


Sunday, June 1, 2014

Eat Your Way to Interesting Templates

I recently joined Weight Watchers - 9 pounds down, thank you very much - and really, everything about this program is brilliant, and I totally recommend it, except for one teeny little thing: their relatively low-key peddling of processed junk food deserts.

Knowing that their clients grapple with excessive food lust, dangling this stuff in front of us should be beneath this corporation's dignity. I vowed when I joined that I wouldn't fall into the trap....but then, well, heck, they've got the words ICE CREAM and WEIGHT WATCHERS on the same box.  So I caved and bought. I'm only human.

Then, even worse, I ate the first one while sitting at my computer, contrary to all weight loss psychologist advice (I'm supposed to eat isolated at a table, staring at it.) I'm also supposed to eat slowly, but somehow, in an all-too-brief amount of time, I was left with this.
 I stared at it intently. First, because I felt like I could eat seven more.

But then, because I quite liked the graceful shape. It reminded me a bit of Cheryl Lynch's  futuristic quilting template I'd used to make this 'modern' baby quilt, described in a recent post.
Since the wooden stick was at my desk, and my desk is a few feet from my trash basket, requiring exercise to get up and throw things away, I started making tracings/doodles with it on the backs of scrap paper. Like this:
 And this:
I was falling in love with my stick. I decided to turn it into a quilt, and doodled another page expressly for that purpose:
But then I decided I liked my first page better. So I traced that onto white fabric, then sandwiched the fabric with batting and a turquoise fabric backing, and quilted around all the shapes in black thread. Next I filled in the shapes with colored pencils:


Here's the back:
Kinda cool, but needed more. I considered painting the background, but I didn't want to get paint on the black thread outlines. I did some freemotion squiggling in the blank spaces:
A corded edging finished it up. I like it!I'm thinking about bleaching out the shapes on the back. I'm also thinking of stitching the original stick to it. Maybe set it horizontally on top.  

It might also make a nice clutch in which to put an ice cream store gift certificate for someone who is young and/or does not yet need to join Weight Watchers.
If you are interested in having this template as your very own to fool around with (plus a low-point processed junk food ice cream treat), these graceful sticks can be found within Weight Watchers Dark Chocolate Dulce de Leche Bars (and some of their other flavors). 

This experience also made me wonder what other templates I had lying around the house. I looked in our plastic tableware compartment and found these: 
Tracing them has great potential - or, come to think of it, I could simply stitch them to a quilt!

Have you made a quilt from templates found around the house? 

Sunday, April 27, 2014

Easy, Modern, and Curvalicious Baby Quilt

What's black and white and red all over? Yes of course, a  newspaper; a skunk with a papercut; and also ....
...This modern quilt that I just finished. I think it's a baby quilt, and it came about, superfast, because my quilting idol and friend Cheryl Lynch mailed me her brand-new 'Curvalicious' tool
The design is fascinating; To me, it has a neo-retro 50s feel, though perhaps I was also influenced by the radioactive color. (It doesn't actually glow in the dark - I ducked into the bathroom and turned off the lights to check.)

After determining that I didn't need lead gloves to handle it, I stared at it for a while longer and waited for it to talk....which it did! "Red and white!" it whispered. Yay, I love red-and-white quilts (how I wish I could have gone to this show), and always need more. So I traced the tool, twice with a washout marker; once onto red-with-white-polka dot fabric - I extended it to 5 circles long -  and once, only three circles long, onto striped red-and-white fabric. The pieces were then cut out with scissors.

I set the two long pieces at 90 degree angles, overlapping the corners, on a white background. Next, the circular openings were used to mark circles on black-and-white, red-and-white, and grey-and white geometric fabrics that I backed with lightweight fusible interfacing, to give them a bit more strength. Those were also cut out with scissors.
(Babies supposedly love high-contrast fabrics, which may or may not increase their IQs.)
Glue-stick everything down, raw-edge applique with a zig-zag stitch and invisible thread, then quilt in an easy sort-of hanging diamonds pattern. (The lines in one direction are straight, and the other have a gentle wave, for an op art effect.)

I could see using these same fabrics and the ruler to make a retro tablecloth and/or apron. Now you may be wondering, what OTHER kind of mood can you create with the Curvalicious design? The answer is quite a lot of them, including contemporary and elegant. Cheryl tested it on a quilt guild in Pennsylvania, and some used her jewel-tone dupioni kit to make stately table and grand piano toppers and wallhangings. Others used cottons for groovy 60ish explosions of rainbow colors. Find all the eye candy from her guild session here.

Cheryl is selling the ruler and an optional dupioni kit on her etsy site - details are here - and I swear I don't get any commission of any kind if you buy them. (Though I will enjoy watching Cheryl become very rich.) I can't wait to see what more people do with this  fascinating and whimsical shape!

Wednesday, July 11, 2012

Postcard from Pasadena


So what we have here is a bed quilt I made maybe in 2010, from a smallish plastic bag crammed with literally hundreds of pieces – hexagons, petals, squares, and shapeless things – acquired a few years earlier at a flea market.  

This was the vintage find of every quilter’s dreams. Stuffed inside were hundreds of cut-out fan petals, as well as other shapes. Even better, there were several templates. The fan template was cut from an old postcard - the part with the postmark! What are the chances?

The postmarked year was 1936; the town, Alhambra, CA, which is right next door to my town.

The pencil writing on the back is still readable:
“I did not get your….
But awfully glad you calle..
Funeral will be…
Thursda….."

There were enough fan pieces for me to complete a 'barn raising' setting, plus three of the four small circles --- you can see that the circle on the lower right only goes 3/4 of the way around.  (In the spirit of modern quilting, I decided to leave the asymmetry.)

I am not really sure why I chose the alternating blue and white setting. My reasoning, in no particular order:
  • I felt like gambling.
  • I had two yards of that pastel blue fabric that someone had given me, and I wanted to get it the heck out of my stash.
  • I love vintage quilts with underlying, secondary patterns. 
  • I love vintage quilts that use pastel colors which, if they weren’t antiques, would annoy me.
The underlying checkerboard, the diversity of prints, along with the documentary templates, makes this one of my absolute favorites. I pieced 7 fan pieces together, into quarter circles, then raw-edge appliqued them to the blue and white squares. (I didn't want to fold back any of the design area on these small gems!)


We keep this quilt on our bed, though I do worry that burglars will  pile it with valuables, bundle it up and take it away. (This actually happened to us about five years ago, and I lost a favorite bed quilt as well as jewelry. On the up side, now I have much less jewelry to steal). But it does make me think that a bed isn’t necessarily the safest place for a favorite quilt.  If we all lived our quilt lives with caution, we’d only have ugly quilts on our beds. Hmmm, What do you think?

That scrap bag was full of surprises. Here are scans of the other two templates. First, for round-edged squares: 

Note the 1941 copyright date. And one for hexagons: 
Here's the reverse side:


The hexagon almost certainly came from the same postcard. The light pencil writing says El Monte on one side, and Pasadena on the other. (Alhambra is more or less in-between)
Sometimes I like to entertain the idea that quilters from the Other Side notice earthly quilters, wandering through thrift shops and flea markets, and they steer us to their scraps, so we can finish what they began. 

Note to unknown quilter from Pasadena or El Monte, now probably in heaven:

I hope you like what I did. I'm awfully glad you called.