
Showing posts with label Tee Shirt Quilt. Show all posts

Sunday, May 13, 2018

A Going-to-College Tee Shirt Quilt, Only 6 1/2 Years Late

Happy Mothers Day to all moms! Here's a project that's poignant but therapeutic for mothers and other empty nesters. It will move all of your offsprings' impossible-to-throw-away tee shirts out of your house!

I wanted to have this quilt ready for my son to bring to college in September...of 2012. It took longer. But I finally finished and presented it to him this week!

The quilt has two themes. Front: Oh, the places you've been!  (Tee shirts from childhood through college).

Back: Oh, the places you haven't been! (Fabrics from Indonesia, Malaysia, and Africa, three random places that he hasn't yet visited but from which I had interesting fabrics that I thought he would enjoy!)

The middle layer is made up of leftover tee shirt parts. (I hate to waste anything. My tee shirt batting tutorial is in this post.)

The front starts chronologically in the upper left corner, and marches through time in columns. The first shirt is so old he doesn't remember wearing it - his toddler Starfleet Academy shirt. Below that is his first soccer team (The Vipers), with what became his lucky number, 11.

The elementary school section culminates in this 5th grade graduation shirt, printed with tiny signatures of every kid in the class:

Moving into the teen years, I liked this shirt more than he did. Now he's stuck with it forever.

I also gave him this one:
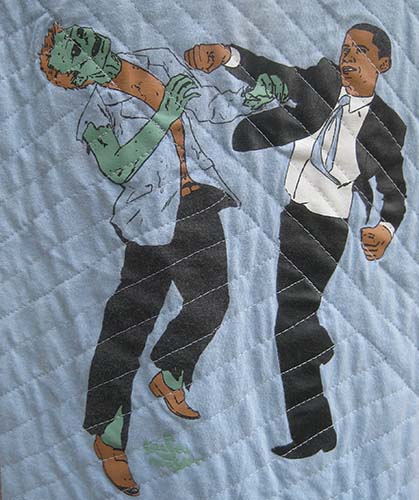
The president punching a zombie was a must-have accessory circa 2014.
The next tee preserves the names of everyone in one of his orchestras:

High school spirit and activities:

The most up-to-date panel, in the lower right hand corner, is a bandana from the 1980s, which his father bought when HE lived in Boston, where my son lives now.

I filled the borders with worn denim jeans. Top right:
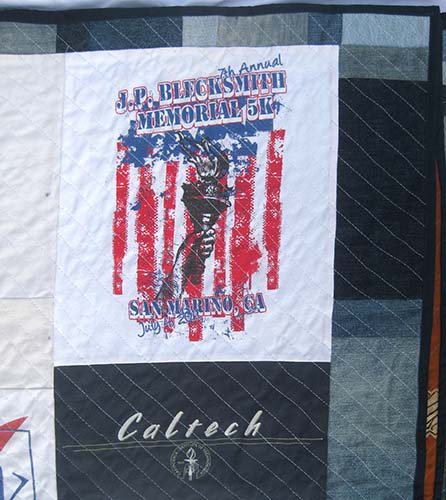
Lower left (authentic mended patch).

The back has some wonderfully graphic fabrics, like this one, from Africa.
Below is a small tablecloth I bought in Malaysia in the 1980s. When my son was an infant, I sewed it into a sling we used to carry him around. Once he outgrew the sling, I deconstructed it, and the fabric went back into my stash, awaiting its time to cuddle him as an adult.
The next purple fabric is African wax "ankara" fabric. (which means it could have been printed in Africa, Holland, or England). The symbols include a graph of the alphabet. Years ago, a friend did some research and told me the meaning is "Book learning isn't everything" - but I could be wrong. (I've scoured the Internet, with no luck - please chime in if you know the symbolism!)
Here's the fabric from Indonesia.
This next piece was an Indonesian sarong. 
I took all the leftover tee shirt parts - mostly collars and sleeves - and stuffed them into old clean pillowcases, or made pillowcases from an old sheet - then I packed those up in my car, and delivered them to the an animal shelter that wants them. (Call your shelter first and ask.) 
Tee shirt quilts have something for everyone! For more about making them, click "tee shirt quilts" in the word cloud on the lower right. Shared on Nina Marie Sayre's "Off the Wall Friday" with lots of interesting art quilt links!

Sunday, May 7, 2017

Memorial Quilt from Tee Shirts, Button-Down Shirts, and a Bedsheet (or two)

One of the many helpful things a quilter can do in this world is comfort mourners with a quilt made from their loved one's garments. Last year, after my friend Wendy lost her father, and was going through the agony of sorting his possessions. I told her I would be honored to make a quilt from his clothing, if she wanted one. Not everyone does, but Wendy liked the idea. Here's the quilt I wound up making.

The first step for a quilt like this is to collect the clothing. Sometimes. if they ask, I help people go through their loved ones' closets; in this case, Wendy did it herself. She brought me a relatively small number of items, about 20 shirts, mostly button down and tees. There was a pair of jeans, some neckties, and a couple of bed sheets.

Back in my work room, before I start cutting or arranging, I light a candle, say a prayer, and have a chat with the deceased.
My next steps are to rough cut the garment fronts, lay them on the floor and figure out a preliminary layout. Then I press fusible interfacing to the back of the knit pieces to stabilize them. Fusing is a looooooong process.
The button-down shirts made from woven fabrics aren't stretchy, so they don't need interfacing. My first cut of those kinds of shirts looked something like this.
I strove to cut as far away from the buttons as possible. Knit shirts with buttons, on the other hand, do need interfacing. Here's how they look rough-cut with interfacing:
I usually arrange my tee shirt quilts in columns. I make it up as I go along, rearranging  for balance, cutting some shirts way down. The columns don't have to be the exact same width, but they do need to be the same length.

When necessary, I appliqué things to other things. Here a section of a Gold's Gym tee was appliquéd to the back of a button-down burgundy woven shirt. (And the crosshatched fabric to the left and below was a necktie.)

(Wendy's dad was a fitness buff, and that's one of the reasons Wendy became a stellar dancer and fitness professional. And because Wendy is such an outstanding trainer, I'm physically fit. So thank you Carl, your focus on health changed my life for the better!)

 Along the bottom of the quilt, and across the top, I created piano key stripes from shirt scraps and  neckties. I saved all the labels from the garments and appliquéd them on top of some of the keys. The back and the binding are made from a bedsheet (more on that later.)
Working on this quilt gave me a profound sense of calm. That had something to do with the many blues; but also I think to do with Wendy's dad.
One of the joys of a project like this is looking at outdated fashions. Remember teeny pockets? 
Carl had a special connection to the Philippines. 

To maintain the calm grid lines, I mostly stitched in the ditch, and also did straight vertical quilting lines about an inch to either side of the button plackets.
 There was one flannel shirt.
When the quilt was finished, I still had plenty of bedsheet material left. So I made Wendy a gigantic carry bag for the quilt.
 It bundles up into the pocket (my tutorial for making a magic pocket tote like this here.)
And there was still MORE bedsheet left, so what the heck, I tore it into strips, watched some tv, and crocheted this:
...A cheerful and fun basket for Wendy's family.

I loved making this project, and being helpful to Wendy. I never met Carl, but by the time I was finished, I felt like I knew him a little bit, and that he was okay with me cutting up his clothing!


Sunday, February 26, 2017

New York Fabric Tee Shirt Quilt Back

Last week, I showed off the front of this tee shirt quilt for my daughter.
It was supposed to be her going-to-college quilt, but I finished it in December, just one semester late. The front has tees from her school years here in Southern California. When the top was finished, I didn't have any leftover tees for the back.

So the backing became a tribute to her present and immediate future in New York City, the location of her college. Creating the back was more of an exercise in shopping and stash-scouring than  art!

If you happen to love someone who has lived in New York City, and you want to make them a memory quilt, the good news is that there are plenty of fabrics that specifically depict The City - as opposed to virtually any other city. (There's a lot of Paris fabric out there, too, but I've never seen Milwaukee fabric or Phoenix fabric, or my hometown, Newton, Massachusetts fabric!)

While our family was touring colleges a year ago, I spent a blissful hour at The City Quilter, a legendary Manhattan quilt store. (The brick and mortar store is now closed, but they continue to sell their New York fabrics online.) That's where I bought the first five fabrics below. They call the first one "All the Buildings in New York," a slight exaggeration.
Running down the side of this fabric above is two-foot-long row of townhouses. At the City Quilter, they had turned it into a long, lean pillow. 
Adorable details: 
The buildings are about 3" high. 
I also bought a fat quarter of black-background NY subway map fabric....
...And  a FQ of the yellow cab fabric above. I had another yard of their white background subway fabric in my stash, that I'd bought from their website years before: 
It's highly simplified, so I hope my daughter doesn't try to use it to get somewhere. At the shop, I also bought a FQ of this "NYC Subway Tiles" fabric: 

And a FQ of my absolute favorite, this pigeon fabric:

Along with those, I searched my stash. My DD loves visiting coffee shops. These two black-and-white coffee fabrics below reeked of  New York caffeine:

My daughter's an enthusiastic thrift shopper, with great taste in vintage clothing, so I used this: 
I had a couple more New Yorkish fabrics, including this beautiful skyscraper fabric: 
And this grim "What was I thinking when I bought it a million years ago?" fabric: 
Can you detect the Statue of Liberty in the middle of this urban dystopia?
The last thing I did for this quilt was assign my daughter to go to her college store and buy the least expensive school tee shirt she could find, in any size. She brought it home for winter break, and I cut out the logo and stitched it on top of some red brick-themed fabric that I used in desperation when I'd run out of NYC fabrics. 
So how did she like her quilt? When she unwrapped it, and saw both sides, her first reaction was this: "It's the story of my life!" Mission accomplished! 

If you're interested in buying New York City fabrics from the City Quilter (no financial affiliation!) find their selection starting on two different pages, here and here. If you're not a stitcher, you can buy fun finished garments made from NY fabric, here.

To read part 1, about how to make a tee shirt quilt with tee shirt batting, find it here.