Showing posts with label Super60 Ruler. Show all posts

Sunday, January 23, 2022

My First Tumbler Quilt! (Not Tumbling Blocks)

First, in case you are as confused as I was, a "Tumbler" quilt is  completely different from a "Tumbling Blocks" quilt! 

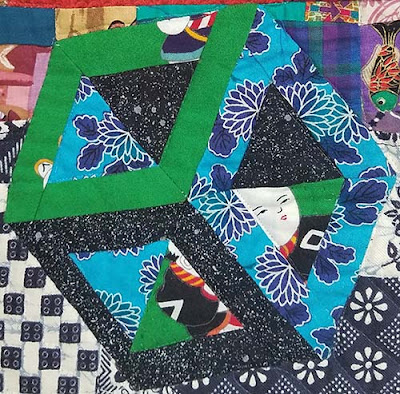
"Tumbling Blocks" are made from 60 degree triangles and diamonds, and wind up with a 3D effect. They're great fun to look at, but technically can be a bear to make. I don't even remember how I pulled off the blocks below, from a Tokyo-themed quilt I made in the 90s, called "Sushi in the Sky with Diamonds." 
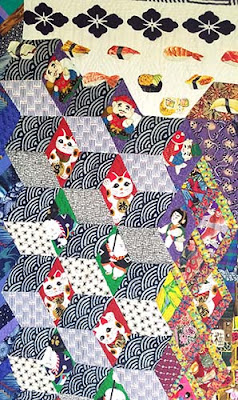
I must have had a much higher tolerance for mitering in those days. On that same quilt, I also threw on some hollow tumbling blocks, carrying little passengers cut from Japanese fabric. 

But in three decades of quilting I never made a much easier-looking "Tumbler" quilt, whose patches are shaped like - guess what kind of glassware? 

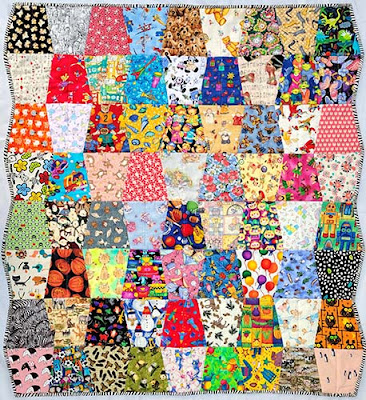
Until now! Here it is. Made as part of my emergency response to the massive baby tsunami happening among my family and friends since the Covid era began.
What made this quilt possible was a wonderful craft thrift shop, Remainders, in Pasadena, California, which has every kind of fiber art notion from the past 50 years. Remainders sells them at such reasonable prices that if I don't like it, I just donate it back to them to sell again! It's like a lending library of sewing stuff!

Specifically, I found this:
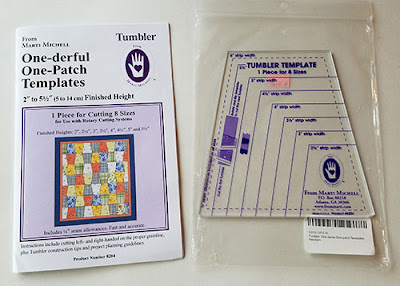
It's Marti Michell's "One-derful One-Patch Templates" They're $23 new at Joanns, but half that price at other retailers (which makes the price only a few dollars more than I paid at Remainders.) 

You may ask, "Why would I need to buy a Tumbler template when I can perfectly well cut a tumbler shape out of a Cheerios Box?" And I asked myself the same question. Then I tried it, and my newly-educated answer is, "This template rocks!" 

First, it's thick acrylic, so unlike a cereal box, you won't trim it with each piece you cut. Second and more mysteriously compelling: The template has these two little jogs in the lower outer corners, on the wider end. Look closely at that bottom right edge in the photo above - the template is not quite straight there. 

When you cut the shape with these slight extra angles, they piece together much more cleanly than if they didn't have the extra angles. If you understand why, please explain it to me!

UPDATE! Several alert readers have explained it to me - Tumblers have strange little dog ears. Reader mary greene (who doesn't capitalize her name) sent me to this tutorial by Nancy Zieman. If you scroll down to the section titled "Construction," the third photo below that subtitle, you see the tiny dog ear on the bottom right that's created if you don't have a shaped template. Because Michell's template has you trim that first, the pieces' alignment is less confusing! By the way, mary has a hilarious blog, where her favorite post is "Two Dog Shirts for 50 Cents," here

I also found many of the fabrics for this quilt from Remainders,  of course supplemented them with pieces from my own exhaustive, exhausting, library of novelty prints.  
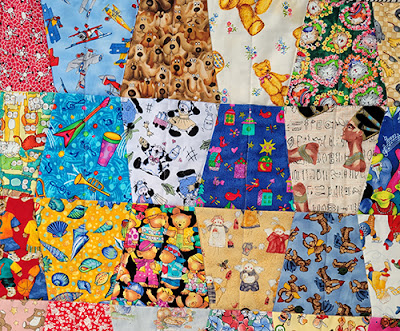
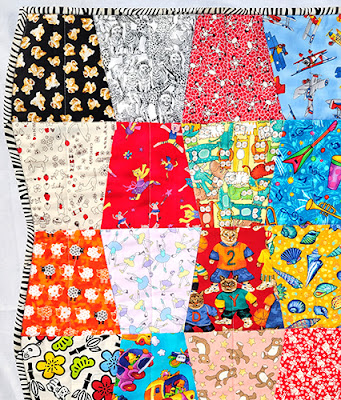
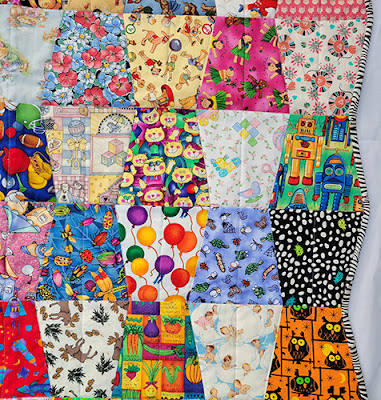
I debated whether to include popcorn (upper left in photo below), since it's a baby choking hazard, but hopefully by the time the baby is old enough to comprehend a picture of popcorn, they will be old enough to safely eat some. Also, the parents could lie and claim they're floating yellow teddy bears.

Every baby quilt should include mooses (above left).
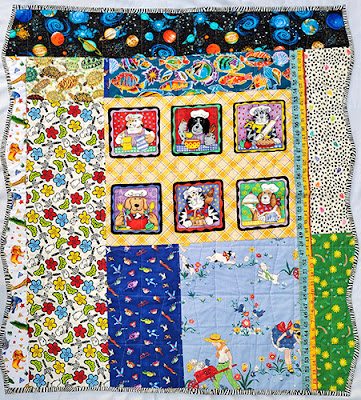
Below, the back. I like putting fabrics that I don't have the heart to cut up into small pieces on the back.
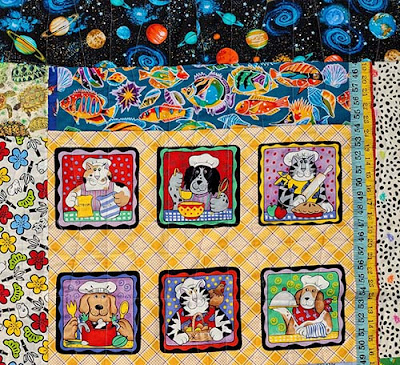
I decided to give the back an astrophysics, fish and pet theme. 

My great debate with myself with this quilt was whether to leave the sides zig-zag, or cut the edges even, thereby losing half of each outer side row. And speaking of pets, my grand-cat assisted me in scrutinizing this important issue closely.
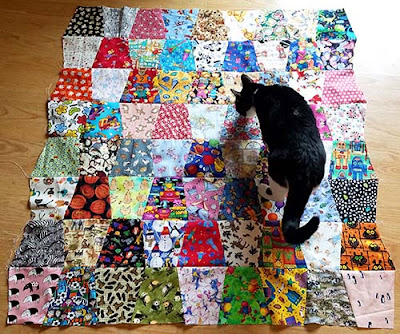
I finally decided to leave the zigzag sides. I cut the binding from bias. At the four corners, I turned the bias the exact same way as for a regular 90 degree corner. And for the gentle ins and outs on the sides, there was no need to take the quilt out of the machine. Just stop on each outermost and innermost point, needle down, and swivel to the next direction, turning the bias along with the rest of the quilt. It's surprisingly easy! 

Tumbler quilts do take a little more time than square-based baby quilts - but with a sturdy-yet-mysterious Marti Michell template, they're relatively fast and a lot of fun. (No financial affiliation). I'll hold onto my new favorite template for a while and see what babies come along next! 


Sunday, October 4, 2015

Old Dog Learns New Trick & Recycles Old Trick for Quilted Stars

Sometimes I think that quilts are just an excuse to show off buttons. Here's a commissioned challah bread cover that I made last week, pre-buttons.

It started when a friend called to ask me if I had any extra challah covers lying around that she could buy to give a family that loves to travel. I looked in my UFO drawer and found three kaleidoscopic stars that I'd made years ago. They looked something like this,

but they were made from this Jewish-themed novelty fabric:

I had used the Magic Star Six by Mace McEligot, a tool that I bought in the late nineties, and which as far as I can tell is no longer made, though you may be able to find old ones on etsy or ebay.

However, you can do the same thing with Sara Nephew's Super 60 tool, which has the exact same configuration of angles, and is widely available. (Find it here. No financial affiliation.)

Start by placing hinged mirrors (an inexpensive notion found in many quilt stores) on top of the fabric, and slide it around til you like what you see. Place the template between the mirrors, with the 30 degree angle inside:

 Remove the mirrors to see the view:

Replace the template, and mark it with a china marker showing where the designs land. With the template in position and a rotary cutter, cut out six identical kite shapes, sliding the template to the correct location each time. Here's how each petal looks (with yet a different fabric! Sorry I keep switching fabrics!)
Now comes the magic: When you fold the petal in half,

and stitch the upper left and upper right sides together,
Press in position:
Trim the seam allowances, then turn the top area right side out (a ball-tipped stylus helps to extrude the point), voila!
The back before the final press
The front. (I know the print is wonky - I just made this for demonstration purposes. Be more careful than I was.)
Rinse and repeat five times. Sew two groups of three petals each. Join the halves, and press the central seam allowance open. You wind up with a neat little six pointed-star frisbee, with finished edges all the way around! Back:
Side:
I'd made three stars from the Judaic print. First, a nearly Celtic star:

A tiny star:

And a white star of stars:

To button or not to button? After some agony, I decided to go for it, with vintage buttons. This elaborate mirror-glass metal button went on the curly star:

A tiny, elegant metal button went on the small star:

And a metal-and-mother-of-pearl and metal shank button went on the white star: 
On the back, I put a travel-themed suitcase tourist label fabric, plus an African fabric with brownish stars. 
So what's the new trick? That blue-and-white fabric around the edges is a facing. Instead of my usual binding or satin stitch, I tried facing for the first time. It creates an edge that's like a pillowcase turn, but no need to stitch together an awkward gap. Facing has grown increasingly popular among art quilters. I found a terrific tutorial on the Silly Boodilly blog, here. Thank you SO much, Victoria, for teaching me how to do this!
Here's the overall cover with the buttons added: 
The freemotion quilting is a cross between leaves and candle flames.

It will be hard to say goodbye to this piece, because I love my kaleidoscopic stars and vintage buttons, like Gollum loves the Ring.  (Except he had only one Ring, and I have approximately two trillion vintage buttons). I hope the new owners will love them as much as I do, or at least not throw them into that Mount Doom lava pit thing.

More of my challah cover ideas and patterns are on my Judaiquilt website, here. I have tried to contact Mace McEligot for this article, but was unable to do so. If anyone knows how to reach her, or if they know a vendor who is selling the Magic Star 6 tool, please let me know.