Showing posts with label New York City. Show all posts

Friday, September 15, 2023

First, Manhattan, Now the World, in Scrappy Quilts

Did you ever want to make a city quilt, but weren't sure where to start? I once trod in your shoes — but now I can help! 

Hot off the press, five years in the making, here's my new 96-page book, 'Scrap Cities: Joyful Modern Architecture-Inspired Quilts.' 

Cities are fascinating in a billion ways, and a quilter could spend a lifetime making city-themed quilts — which I feel like I just did (In fact it's only been about five years).

'Quilted New York,' the book before this one, took me a year bent over a smoldering keyboard, plus before that, happily shlepping around Manhattan, photographing every building (sidewalk, wall, bus, etc.) that struck my fancy. I had a blast, but drove my family, computer and left knee, nuts. What I got from it: meniscus surgery ($ thousands), a new computer drive ($ hundreds), and the following book: 

'Quilted New York, Celebrate the City with Fabric and Color,' was published  in December 2022. It's a love letter (with an occasional 'what the heck?' but a stronger word) to the city where I was born, and which gave my parents a shot at the American dream. 

While working on it, I collected material that applies to ANY city — and I sewed quilted cityscapes of Chicago, Los Angeles, and multiple fantasy locations. (Here's Chicago, for example.)

So, naturally, after finishing the New York book, I wondered, could I turn my mountain of leftover ideas, photos and projects into an any-city book? 

The task seemed infinite...I plodded...I experimented...the days rolled by (water flowing underground)...until a few weeks ago, when I realized it might be done. (The last building I added was this:

...based on this photo my friend Gail Solomon just took while travelling in Holland.)

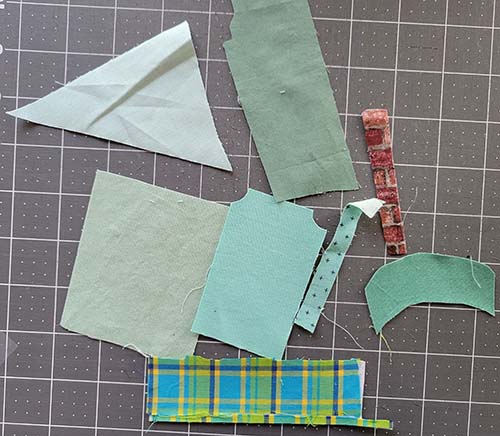
What the two books have in common: A method for pressing raw edges to the back during piecing, instead of afterwards. This makes fabric buildings strong; when you finish piecing them, their trickiest edges are already neatly turned, you can easily and quickly appliqué them anywhere you want -- especially overlapping OTHER buildings, to replicate the magnificent clutter of big cities.

What's the difference between the two books?

'Scrap Cities' has instructions for 25+ buildings. Some are inspired by real buildings; some are pure fantasy. 'Quilted New York' has instructions for 11 structures, all inspired by real NYC buildings. 

-  There are NO quilt patterns in 'Scrap Cities,' although there are many examples and suggestions. You decide which buildings and how many to make. The book helps you brainstorm ideas and arrangements, to create anything from a 1-building pillow to a 3-building wallhanging, to a 12+ buildings bed quilt. 'Quilted New York' has two different quilt patterns for quilts about 60" square or larger.
 
- 'Quilted New York' encourages you to improvise, within limits. 'Scrap Cities' goes much further. It shows you how to use the book's patterns and ideas as a launching point to design and create your own buildings, whether inspired by a real one, pure fantasy, or a hybrid! There are sections on windows, roofs, stairs; curved buildings, triangle-based buildings, etc. This beach house-themed quilt is in the "stairs" section:
'Scrap Cities' is unique in that it offers a variety of fun ways to create artist's perspective, using strategic cutting of geometric fabrics; and/or value choices; or literally adding a side-view onto a forward-facing building, to give it a  3-D 'wow' factor.

'Scrap Cities' also offers ways to incorporate fun novelty fabrics, for a baby or child's quilt, and/or for an eco-cities quilt; plant flowers, vegetables, chickens, your cat, etc., on balconies and rooftops! Below is a lush rooftop garden of Kaffe Fassett kale, serenaded by a violin-playing angel. It grows on a pieced zigzag plaid building that's a takeoff from real buildings shown in the book. The treehouse trunk is made with fusible raw edge applique, but the cabins are all turned-edge, and appear dimensional thanks to a simplified attic windows trick explained in 'Scrap Cities.' 

(On the lower left, riding the cable car are...The Beatles!) 
“Modern” in 'Scrap Cities' subtitle ('Joyful Modern Architecture-Inspired Quilts') has two meanings—the modern quilt movement, with strong graphics and simplification; and modern/contemporary architecture. 'Scrap Cities' projects take inspiration not only from what's formally called "modern" architecture, but also from elaborate Art Deco structures, turgid grey Brutalism, "postmodern" whimsy, and more! In the last category, here's Frank Gehry's 8 Spruce Street Tower in lower Manhattan, with  inexplicable yet charming stainless steel ripples.

And here's my version, made with an improv curves technique. (This could also serve as a river.)

Where to learn more about either of these books?
'Scrap Cities' in digital (PDF) form is in my etsy shop, here. Find the paperback in brick-and-mortar and online quilt and book shops, or in my etsy shop, here

'Quilted New York', (84 pages), is sold in paperback and digital form. In digital (PDF)  it's here. In paperback, buy it from quilt or bookstores, or directly from my etsy shop here 

Interested in both? A digital bundle to purchase both, with $10 off the total price, is here

See more of my cityscape quilts on my website, here. And everything else in my etsy shop is at https://cathypstudio.etsy.com. 

Now that 'Scrap Cities' is finished, is another cityscape book in the making? I'm torn. I still have a few leftover patterns for Los Angeles buildings....

Which cities would you like to make in fabric?


Wednesday, March 15, 2023

Quilty House Portrait: A Labor of Love

I've made a lot of cityscape quilts, and I always have a blast doing them. Here's one, "Nonsense Town." 

And here's a closeup of some of the buildings. Let's look at that orange one. 

With a single plaid, I suggested zillions of windows. The other buildings, similarly, have relatively few pieces representing hundreds of windows.

Below is an even simpler example, a potential skyscraper made from two print fabrics. It would take 4 minutes to cut out and sew together. The darker perspective side gives it a nice dimensionality. Modern skyscrapers require so little time to represent so much living/office space.

And here's a 14" pillow I just finished for a dear friend, who I've known since 2nd grade, portraying her charming childhood  home. This took freaking months.

We started with some old photos, including this one: 
Online, we found more photos, though none with a good head-on view....
She also sent me a lovely sketch that a friend had made 40 years ago. Unfortunately for me, the artist  opted for geographically-accurate foliage in some of the trickier areas, perspective-wise, so it didn't give me a lot of guidance.
I came up with my first draft of a pattern by tracing the dark, ancient photo, with her standing in front. (The disruptive lines are the tree.)

I wanted to include her, but she nixed that. So, after several drafts from several angles, here's the simplified drawing : 
(I moved the tree. It ended up disappearing completely.)

The tracing and drawing was done in my graphic design program, CorelDraw (but you could do this all on paper). Then I upsized it to about 14", which required four sheets of letter-size paper. I taped them together, taped the whole thing to a window, and started tracing pattern pieces. 
I traced every element of the house onto a new piece of paper. I cut them out, flipped them to the back, and traced them onto the back of paper-backed fusible web.  Here are just a few.
We also had to work out the colors. Since computer color is unreliable, I sent her to the hardware store to look at paint swatch cards. She sent me 8 of them, with notes. 
From those I picked a palette. Most are solids, but there's a faux red brick novelty fabric, and the plaid on the bottom represented the grid under the porch. I chose pieces a little darker because I knew the house would need contrast for its many different sections to show. 

My friend had some more specific requests. She wanted a Dutchman's Pipe on the porch, and since I had no idea what that was, she sent me photos.

Layer by layer, I traced each piece, cut it out, and pressed it in place, on top of an applique press sheet. When everything was just barely fused in place, it was time to choose a background. I set the house on a couple of different candidate skies and took photos to send her. This one's dramatic...
 
But perhaps a little bleak; good for a Wuthering Heights pillow. 

I liked this one, but the batik didn't really go with the flat house colors: 
 
I liked this rainbow/unicorn sky, and my friend is a very colorful person. 
And more. The one she selected was also my favorite, with puffy white clouds. I think it gives the house a dreamlike quality, appropriate for a nostalgic memory project. 
After fusing the house onto the large sky square, I stitched everything in place, using a machine satin stitch, or, for the tiniest pieces, straight stitch (like the dark strips of the porch railing). 

The windows needed panes - I hand-embroidered those with white pearl cotton, using a backstitch.  I also hand embroidered the heart motif in the top red triangle, and the other red trim areas.  
 
I called my friend to find out what color her doorknob was and what side of the door it was on. For that, I used a vintage metal shank button.  She also mentioned the mailslot on the door, which I hadn't seen in any photos, so that was a last minute addition.
And she requested a lilac bush on the left. 
The lilac blooms and bush were cut with pinking shears, fused in place, and then freemotion stitched. I chose a fantasy aqua color because a more botanically-accurate dark green was in the house on that side.

So speaking of fabrics, how many separate cut, fused and stitched pieces would you guess went into this house? I'm counting around 70, not including the background sky. 

(There's one more fabric on the pillow's back, a different sky, because I ran out of the puffy cloud fabric on front. The  pieces are overlapped, with hook-and-loop tape holding them in place.)
This project was a labor of love. It made my dear friend very happy, which was the point. I learned a lot that will be very useful. But it does leave me with a burning question for you and me: If a client (who was not a lifelong friend) wanted a 14" pillow with a portrait of their gorgeous, detailed, gingerbread-style home, how much would you charge? 


Interested in portraying much more real estate, much faster?  Check out my new book, "Quilted New York; Celebrate the City in Color and Fabric," at https://cathyperlmutter.com/books-and-patterns/


Thursday, January 5, 2023

Celebrate New York City! Make a Quilt!

My favorite things in life (aside from people) include most foods; most quilts made by someone other than me; and many aspects of New York City, which is sorta my ancestral homeland. 

So I am thrilled to announce that after a lifetime of gestation (plus a year of actual work), my book, "Quilted New York; Celebrate the City with Fabric and Color" is in print and available! 

Here’s the proof, my new book in my old hand, wearing my Dad's even-older ring (I think my grandmother gave it to him in the 40s). My Mom’s ring is on my other hand. I wish they were here, because New York City played a big role in their lives.

The book has detailed directions for making 11 structures inspired by iconic NYC architecture. There are two quilt patterns, one for this quilt, which I call "Color Block New York." (It can be about 70" square, more or less, depending on border choices.)


And for people with less wall space, there's "New York Condensed," which is about 60" square. 

My Dad's mother, a turn-of-the-century immigrant from Poland, settled in a one-room tenement apartment in Williamsburg (at 182 S. Third Street). Her husband abandoned the family, so she raised two sons alone, toiling at a sewing machine in a leather pocketbook factory. It’s such an irony that the sewing which wore her down brings her granddaughter so much joy. I understand how much luckier I am than her; the unconditional love she showered on us despite so many years of hard labor is one of the reasons I have the luxury of enjoying recreational stitching.  

My Mom was a death camp survivor from Radom, Poland, who moved to Brooklyn after the war. 

New York City gave both of them refuge and an excellent education. Dad earned an undergrad degree from NYU, and a graduate degree at Columbia U's Teacher's College; his tuition was paid by the GI Bill because of his combat service in WWII. I don't know how Mom paid for Hunter College, but it couldn't have been expensive, because it was public.

When I was in elementary school, we'd visit my Bubbie (grandmother), in that Williamsburg apartment. To my frustration, our parents absolutely forbade my brother and me from playing on the tantalizing fire escapes.

So New York always felt like my homeland. One building in my book is a tenement, complete with fire escape, in honor of Bubbie. (I took artistic liberties with the color).

It's my hope that the book will appeal not just to fans of The City, but also any quilter interested in portraying any city. 

First, because the book teaches my unique piecing technique for architecture, in which most raw edges are turned to the back during piecing, so you don't have to rip seam ends after the building's pieced. This method works well for all kinds of architectural appliques. 

Second, even though most of the buildings were inspired by particular New York structures, there may be similar buildings near you.

For example, the Empire State Building shares the wedding cake profile of many of its peers across the country that were built in the 1930s. Here's one of my depictions. 

The next structure was inspired by the New Museum of Contemporary Art, and the edge-turning-during-piecing technique works particularly well for so many post-modern buildings like this that have cantilevered sections hanging out beyond lower sections, with no supports at the ends, an engineering as well as a piecing and applique challenge.
Making my version of the Freedom Tower (gold below) was a little like making pants, because the base piece was so long. Next to it is a purple-ized Chrysler Building variation, with arcs of triangles.
 
And so forth! The book invites you to either follow along with detailed directions, diagrams, and measurements; or if you prefer, improvise your own variations. 

Learn more about the book at my shiny new website, here. Where can you buy the book?

1. Ask at your local quilt shop. Tell them they can order it from me, or via the wholesaler Ingram Books. (If you ARE a quilt shop, please contact me for more information, at cathy.perlmutter@gmail.com)

2. Order it from a local bookstore: Go to Indiebound.org, and enter your zip code, to find a local bookseller who will order it for you (from Ingram).

3. If you'd like a signed (printed) copy; or a digital PDF edition, find both in my Etsy shop.

4. And, yes, it is on Amazon here, as well as other online booksellers. 

Please do feel free to email me with any questions!


Tuesday, July 20, 2021

Photoshop Your Quilt into Different Quilts

My big idea was to create a building under construction, based on some of my New York City photos, especially of the building on the left.

To capture the sense of looking directly inside rooms, I drafted a foundation paper piecing patterns. It's constructed in strips. Here are the top portions of two of the strips. 

And here's what it looked like, all sewn up. It didn't give as much of a sense of space as I'd hoped.  

It's very small - most  pieces are an inch or less - so there was no obvious way to slice it apart, to turn it into something else. 

But while doing routine editing of the image in Photoshop, I decided to play with some of the filters. I am not great at Photoshop, but I do know how to click on things, in this case, the menu items under "Filter Gallery".  

First, "glowing edges." To my surprise, this image gave MORE of a sense of a building under construction than the fabric version! It also bears a strong resemblance to my original foundation pattern!
I'm titling the next experiment, "Jaws 1". I see circling sharks. Unfortunately, I didn't write down the command I used. I also have no idea how one could make this in fabric, except maybe through extremely intricate applique. 

Here's what the "pinch" command produced: 

"Polar coordinates":
Here: "Shear" 
This looks like rick-rack.
"Zigzag" command: Jaws 2: The sharks are speeding up.
Jaws 3: The sharks are going so fast that they are exuding global  centrifugal forces, causing tsunamis.
This came from the "stained glass" command. This design could be replicated precisely, with English Paper Piecing, but you'd have to number every paper piece, and add arrows showing which end is up. Cutting and sewing the pieces together would take years. 
However, the program allows you to reduce the number of cells, which creates something very doable.
To that image, I added Glowing Edges. How cool is this? It looks like a modern stained glass quilt.

"Extrude": Looks like a helicopter view of a city of LEGO skyscrapers. 

My favorite - "spherize" - because the results look so real.
Adding "glowing edges," a potential pattern emerges. 
There is one easy way to make any and all of the "impossible" quilts: Print them onto fabric, from your home printer, or through a service like Spoonflower.com, and then quilt it! 

More ways to play with your photos of quilts, and then transfer them to fabric to create a new quilt, is in a 2014 blog post, here . My experience with miniaturizing and printing entire quilts via Spoonflower is here.