
Sunday, July 2, 2017

Stitching and Gluing for a Steampunk Wedding: Agony, Followed by Ecstasy

When I first heard that the daughter of a dear friend, Caitlin, and her wonderful fiancé Nathan were having a steampunk/time travel wedding, I was taken aback and began kvetching loudly to no one.

First, because the wedding was in April. Aren't costume weddings for Halloween?

Second, who ever heard of a costume wedding?

Third and the real problem: What would I wear? I have enough trouble shopping for acceptable contemporary attire, let alone swathing myself convincingly in garments of the past.

But then I recognized this invitation for what it was: A stitching/crafting/destashing opportunity. Specifically, to use up my teensy pile of rusted watch gears that I'd purchased years before, when Steampunk first became a thing. I'd paid $10 for maybe a half-gram of old watch parts like this.
My DH is also costume-challenged. It came to me that if I made us couple of Steampunk brooches, they could serve as 98% of our costumes. I mean, we'd go fully dressed in SOMETHING, but the brooches would automatically make us Time Lords (That's a Dr. Who thing.)

I also wanted to give the happy couple something beyond the check. They are such nice people that they would probably thank us sincerely if we gave them yak manure for their garden (if they had a garden). But time travel is such a great theme. Surely I could whip up something from my fabric stash, much of which has travelled over a very long time and distance to reach my house.

I went through my UFO pile and dug up this denim and lace composition, that I'd agonized over last year.
A tutorial for laying down the denim background and auditioning embellishments is in an earlier blog post.  In the last paragraph I grumbled that I didn't know what to do with it.

But now its destiny was clear! Everything on it was vintage: the jeans, the mother-of-pearl  buttons (and some made of ye olde plastick); the intense lace, especially those corner cut-out squares, which make me swoon!
(What were these lace pieces originally intended for? Collars?) Come to think of it,  I convinced myself, the piece was old, new, borrowed and blue - perfect for a wedding gift. 

I felt it needed something more - everything does - so I tried scattering my pile of rusty watch gears over it, but the result wasn't great, and what the heck would people do with a textile that had rusty old things glued to it?  (Don't answer that.)

I dug out my last fragment of a wonderful millenium print fabric, bought in the year 2000, with clocks printed all over it. I cut up some clocks and lined them up in the border. Not bad! I appliquéd them in place with (very modern) invisible thread. 
A little closer: 
A lot closer: 
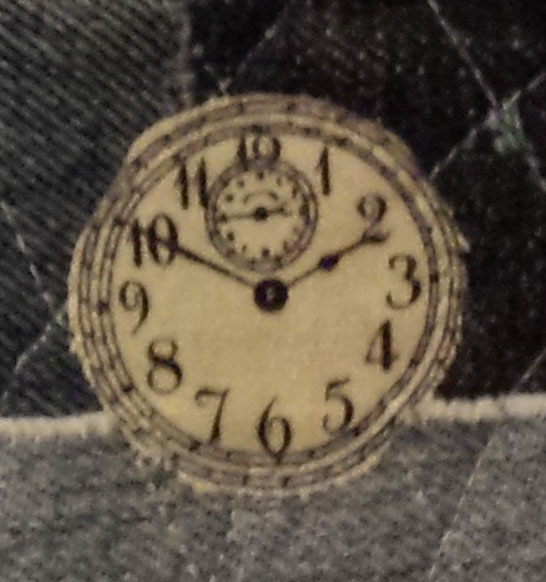
So easy! So fun! Better present than yak manure! And it ended too soon! But by now my Steampunk pneumatic cylinders were churning. I dug out a circular and and an oval wooden shape, glued batting on top, and covered them with  plaid silk from an old upholstery sample book. I then glued my overpriced watch parts on top. I sprinkled on some buttons, keys and a cool old toy compass for good measure. Glued pins to the back. (Detailed tutorial, see below.) Here's brooch #1, which I wore to the wedding....
And here's #2, which I only took a really bad picture of (sorry), which my husband wore: 
As the wedding wound down, we pinned this one to our gift, as an additional present.  

Along with the brooch, I wore my mother's 1980s-era fringed white cowboy shirt. Thus I was a time travelling steampunk cowperson who was also my own mother (That happens a lot with time travel). My DH wore the other brooch, my mother's trench coat, my Dad's Irish tweed cap, and my daughter's large red bowtie (leftover from her Halloween stint as Dr. Who). He did look Whovian. 

The wedding was an absolute delight.  Any doubts I had about the idea of a costume wedding vanished the moment I set eyes on the bride and groom.
Are they not gorgeous? And it was soooo much fun to see the guests dressed creatively. Some eras were particularly popular. There were a half-dozen Starfleet officers, include the bride's tiny 93-year-old grandmother sporting realistic Vulcan ears, along with her Federation uniform.  She's an interplanetary firecraker! 
The mother of the bride, and several other women wore flapper costumes that they'd cleverly bought on AMAZON! I wish someone had told me that costuming could be so easy! Here's mother and daughter: 
There were gears hanging from the ceilings and strewn on the tables, along with pages from old books. In short, it was waaaay too much fun! Thank you for inviting us, Nathan and Caitlin, and mazel tov to you both! 

Want to make your own Steampunk time traveller's brooch? Start by rounding up all your metal things, ideally old, broken,  and rusty....Don't neglect bobbins. If you don't have vintage embellishments, you can buy fake vintage at the craft store. Here are three small Steampunk-themed wallhangings I made years ago for an online craft swap.
Yes, that's a sewing machine light bulb, a broken bobbin, and some fake gears from Michaels....
A bow made from metal screening....
...A nest made from wire and a fake pearl....and whatnot.

Create a wearable backing. For the wedding, I used wooden shapes, but cardstock, fusible interfacing, or even faux leather or Kraft Tex(TM)  can work.  Cover with batting, and then interesting fabric cut larger than the shape, with edges pulled and glued to the back. Next....

1. Trace around the entire shape onto a piece of faux leather, real leather, or felt....(I really really should have done this before gluing the stuff on it). 
2. Cut out the shape....
 3. Plan the pin location, then mark where the sticky-outie parts are....
 4. Use an xacto knife to cut slits....
 5. Pray while pushing the tip of the pin and then the critical parts through....(sometimes it takes a couple of circles and cuts to get it right)....
 6. Smear glue liberally. Be more frugal as you reach the outer rim.
 Smack that thing on the back!
Let it dry and add glue as needed. Now you are a potential Time Lord, so have fun with your inter dimensional travels!

Sunday, June 18, 2017

Three Easy Pieces: Artistic Potholders from Scraps

I love making potholders.  They're:
  • Low-pressure;  
  • Relaxing, especially between larger projects; 
  • An opportunity to experiment with new techniques;
  • An opportunity to get fabrics out of your stash and into the world;
  • And the result is something you can give as a gift! (Christmas/Chanukah: Six months away!) 
If your friends recognize them as brilliant art, that's great, and if they use them on greasy pots, that's great, too! (Okay, not quite as great.)

Potholder 1 - Solid Scraps 
Directions: Take a bunch of solid scraps; stitch them together. Quilt using your relatively new Handi-Quilter mini scallop ruler, just for practice. (Quilting with rulers is like learning to juggle, and requires infinite practice.)
Fill with two layers of batting (or one layer of regular cotton batting, and one layer of thermal batting, like Insul-Bright.)  For backing, shop your stash until you find a fragment of home decor fabric that you never used because it was awkwardly cut: 
When giftees ask why you put the pears in such an unusual position, pretend you did it on purpose and explain asymmetry. 

Potholder 2 - Kaffe's Kitchen
Directions:  Scour your stash or Internet to locate fragments of stunning giant vegetable fabric from Kaffe Fassett and his co-conspirators at gloriouscolor.com. This fabric was always (1) too nice to cut into, and (2) so distinctive that it takes over any project, and (3) Giant turnips? Cut it in large chunks, and combine with other fabrics if necessary. 
On the back, plop down another piece from the Fassett collective that's been in the stash for too many years.
I accidentally installed it upside-down. (I did that on purpose! Because, uh, asymmetry?)

 Potholder 3 - Fruit & Cupcake Salad

Directions: Locate all your fruit fabrics, cut them into rectangles, and sew them into a trapezoidal top. If you don't have enough fruit fabrics, feel free to add vegetables (brussel sprouts, hot peppers), carbs (bread, pasta, pretzels, a fortune cookie), fats (avocados) and dairy (ice cream).  This piece is so almost-healthy on the front that you can use something like this on the back:
 Mmmmm good! What kind of potholders do you like to make?

Sunday, June 11, 2017

Stuffed Pomegranate Recipe, High Fiber (Don't Eat Them)

Have you ever looked at a large-scale fabric and been tempted to cut out and stuff one of the motifs? That's what happened to me when I first saw this fabric.
It was designed by Alex Anderson for RJR Fabrics. For the last two posts, (1, 2), as part of a Pomegranate Guild of Judaic Needlework challenge, I've been playing with a yard of it.

The pomegranates are so juicy - 3 1/2" high by about 2 1/2" wide - that I had an overwhelming urge to stuff them!

So I did.

 I needed gifts for the guild's convention in May, so I made a bunch: 

I cut them out just slightly beyond their borders; sewed them wrong sides together against navy or scrap fabric; left a gap at the top; then turned them right-sides-out. Stuffed 'em, stuck an embroidered ribbon loop in the opening, hand-stitched the opening shut, and sewed a vintage red plastic button on top.

Added gold ball chain through the loops, and a gold safety pin, just in case. That makes them multipurpose! Key chains/luggage markers/pincushions!? Fluffy pendants? Beadable!? If I put a bell and some catnip in them, they could be a cat toy!?

I cut a sixth one a little bigger, to incorporate foliage. Poked in extra polyester stuffing, and hand-quilted around the fruit, so it popped forward.
 
Scraps on the back: 
Next, as special gifts for two of our many guild members who deserve medals - I made medals! 
Back: 
(The base is stiff fusible interfacing, Peltex 72F in this case.) 

Even after these projects, plus my earlier 2 stars and 3 hexagonal mats, I still had about a quarter yard of my yard left....More to come! 

Sunday, June 4, 2017

More English Paper Piecing Hexie Adventures with Pomegranate Fabric

Last week, I showed you the Pomegranate Guild of Judaic Needlework's latest creative challenge: To make a project using one yard of this gorgeous print from Alex Anderson's "Mirage" Collection, generously donated to the Guild by RJR Fabrics:
That post had a tutorial for making kaleidoscopic stars using English Paper Piecing (EPP). After finishing those, I made the following. 
Closer:
They're also English Paper Pieced, of course. It dawned on me that the main motif on the fabric would fit a traditional grandmother's flower garden quilt block. I figured out how big the shape would have to be and drafted it in my computer program (CorelDraw). 
I cut one copy out as a solid piece (from an old file folder). 
And cut a window: 
I traced the outside of the window to freezer paper and cut that out. 
 The window helped me figure out where to cut.
Slipped that away, put in the freezer paper, and ironed it down. Trimmed the fabric about a half-inch outside the paper edges, all the way around.
Treated this like needle-turn applique. I clipped into the concave curves to 1/8" from each inner angle.
Dripped fray-check on the innies. 
Pressed and glue sticked the seam allowance on top of the freezer paper. Two or 3 threads of the fabric should roll to the back.
 Glued all the way around.
 Front:
In the same computer program, I made a sheet with as many component-sized hexagons as I could fit. (The component size turned out to be 2.586". Argh! If you're working with the same fabric, you can  get away with 2.5" or 2.75".)

Printed that out onto cardstock. For three blocks, I needed 12 x 3 = 36 cardstock templates. Here's how many fit on an 8.5" x 11" piece of cardstock.

Cut those apart, then glue-basted solid fabrics onto them. Back:
Front:
Now to stitch those guys around the motif. Some are attached  on only one side; and some are attached on two sides, like the lighter orange piece in the picture below. EPP makes these kind of y-seams easy.  I sewed the first seam in place (above and parallel to the white arrow drawn in the picture below...
(The arrow is pointing at the actual needle taking the penultimate stitch). Took an extra stitch at the center. Then realigned. Below, the second side is being moved into position so its right upper edge lines up with the underlying dark edge. 
Stitched them together, open it up, and there it is, neat as can be, attached on two sides! The next hexagon will be attached on only one edge, and the hexagon after that will be attached with a y seam again.
Now that I have three of these, I can't decide whether to finish them separately, and gift them as festive wallhangings/ potholders?  Or stitch all three together to make one holiday table runner? (Maybe with some dark blue hexagons in the spaces in-between?) Your vote counts! 

Interested in learning more about Judaic needlework, including quilting, embroidery, needlepoint, knitting and beyond? Check out the Pomegranate Guild of Judaic Needlework's webpage here. To learn more about Alex Anderson's Mirage collection, scroll to the bottom of my previous post, here.