This is a mystery quilt adventure. If you hate suspense, scroll to the very bottom of the post to see the finished quilt. If you enjoy mysteries, read from the top.
I'll begin this story in front of my UFO (unfinished object) cabinet, a terrifying place, in a far corner of my sewing room, under the ironing board, behind/beneath my Featherweight table.
To open the cabinet's doors, I have to curl myself into in a fetal position - then, the doors open only halfway, before smashing into my knees. Fetal position also describes my emotions, when I look at what's inside.
So I tend to avoid the place, for years on end. But a couple of weeks ago, my quilting friend Joni posted on Facebook that she wanted someone's UFO as a challenge.
I knew had to move fast or she might not take mine, so I curled myself down, pulled stuff out, and found something almost presentable for her (I'll show you that in a future post).
I also dragged out what you see below - a partial top, about 4 feet square, my first UFO. (The thing lying on the lower star point isn't attached, I'll explain below).
I made it in 1991, the year I started quilting. This was perhaps my third quilt attempt, a Mariner's Compass. (My first quilt was Eleanor Burns' "Amish Quilt in a Day," a thrilling beginner's book - Eleanor's new and improved version is HERE).
Mariner's Compasses are challenging for even master quilters, and today, with my 29 years of experience, I would not dream of tackling one without precision foundation-paper pieced (FPP) patterns, ideally vetted by a jury of scrupulous architectural professionals.
But for a beginning quilter, with no knowledge of FPP, a Mariner's Compass is insane. I know it doesn't look too bad from a distance, but let's get closer.
I had created and cut separate templates for each piece. including the eight pieces of the rectangular background. (Today, I would applique the star to the background, which is vastly more fool-proof and stronger.)
In the center, I made 16 points meet. This created concentric ripples in the space-time continuum, dragging me into its vortex and crushing my soul every time I looked at it.
Even less forgivable is that many of those fabrics are crap - the yellow is see-through, the pink is too, and the aqua blue might contain polyester.
The star points don't look bad from the front - only one had a hole - but the back, seam allowances flip around like playful sea otters. And speaking of oceans, each seam allowance ebbs and flows between 1/8" and 2".
Squint, because this could harm your eyes.
Why so many thread colors? Why do seams stop and start? As a novice, I clearly engaged in magical thinking.

Also bundled up with the centerpiece were these spare star points.
Plus eight not-badly-pieced Evening Star blocks.
And a couple of pieces of the fabrics below. If this color scheme looks familiar, it's because it was all the rage in the early 90s. The prints - I think they were the first ones I ever bought - were designed by Mary Ellen Hopkins, a hilarious and brilliant quilter. Sadly for all of us, she's passed away, but her books and spirit live on, except not in this photograph:
I loved these two colorways. And today, I still like the turquoise one. But the magenta one gives me a headache, and both become excruciating when large quantities are next to each other.
With all those issues, no wonder I couldn't finish it. But I also couldn't throw it away. So the bundle moved with us to California, where we made babies, had careers, and after several years, I apparently tried to save it by creating this small star, to cover up the central ripples. It's hand needle-turn appliqued, onto a "backing" of ultra thin purple fabric. I still had not learned my lesson about buying the good stuff.
I obviously decided this wouldn't work, so back in the cabinet it all went, awaiting a new millenium.
Which brings us to 2020, l'annee terrible. As I laid it out on my floor, I had a new, Covid-esque thought: I could be dead in a month. It's time to finish it, or mail it with lots of cash and a pleading letter to Joni. I decided to rescue it myself.
The first thing I did was relieve the concentric pressure in the middle by cutting out an oval. (I'm not sure if you can see that some of this stitching was by machine, and some by hand.)
I machine stitched the purple-backed central star to the center, using a decorative satin stitch because the purple fabric was too flimsy and narrow to turn under.
When I looked at the back, I realized something else frightening....
In the center back of the star, there was fusible residue.
I decided to ignore it. Yes, I still engage in magical thinking.
Then I remembered that I might have other discards from this quilt in my scrap stash, aka The Infinity Suitcase, which, like Dr. Who's Tardis, contains multitudes. When opened, the scraps instantly aerate and sproing upwards like a newborn volcano, then spill all over the floor like hot lava. (That's why I rarely open it, and pile things on top, to hold it closed.)
I couldn't find the discards from the same project, but I did find a stack of these paper-pieced sashing units, made for a different quilt, (a Freddie Moran quilt, she's my idol), a mere 23 years ago. They'd wound up the wrong size, so I'd ripped them out of the quilt and crushed them into the Luggage of Doom.
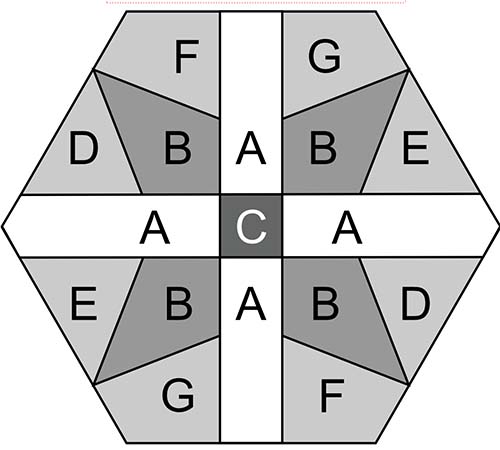
But wait, there's more! Just before diving into my UFO cabinet, I had decided it was time for me to get more experience doing curved English Paper Piecing (EPP). So I was turning some of the straight line patterns from my EPP book, Hexagon Star Quilts, into curved patterns. Here's one.
Looks good, until you closely inspect the outer points, some of which have tiny-but-unforgivable gaps. (From these experiments, I learned that curved English Paper Piecing should only be attempted when there are very few curves.)
While playing around with all these components, I also couldn't help noticing colorful little arcs and their templates scattered about on my coffee table, leftover from my recent mask scrap quilt. I hadn't exiled them to the Suitcase of Terror yet.
So, to review, I took my:
- Unfinished Mariner's Compass quilt, okay from the front, sad from the back,
- Eight eye-searing Mary Ellen Hopkins blocks (note how I cleverly shifted the blame to her - she was such a fine person, I'm sure she wouldn't mind),
- 30 paper-backed yellow-and-black star points, plus I made some colorful ones for the vertical borders, and a few half-units for the central area,
- Curved EPP experimental blocks, and
- Colorful little arcs....
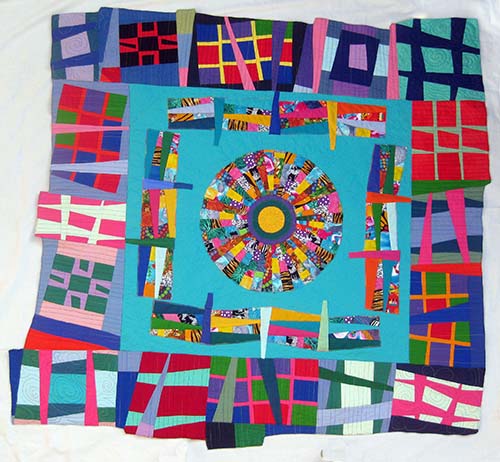
...and sewed them all together. It took me about two weeks. Here's the finished quilt.
Since the yellow fabric in the central star was so thin, I decided toss some arcs on it. I think they look like festive thumbprints.
I freemotion quilted the heck out of it. I am currently obsessed with Christina Cameli's approach to FMQ - I love her book, Texture Quilting, no financial affiliation.
Here's the quilting on the Evening Star blocks.
I quilted eyeballs in each diamond-shaped sashing opening, because eyeballs are always in good taste.
The (mostly) EPP'd block on the far right, below, reminds me of a bobbin. I didn't notice that until after I made it.
The block on the lower right is EPP'd and then appliqued to the blue hexagon. The block on the left is regular machine applique. The latter is so much easier, faster, and more accurate.
And here we are, all done, from a different angle.
In conclusion, if you, too are haunted by hopeless UFO's here's my best advice:
- With at least one quilting friend, or a guild, have a UFO swap. Joni's request forced me to open the scary cupboard and seriously reevaluate whether my UFO's could be saved.
- When you pull out one UFO, drag out several more and look at them together. This invites serendipity. Given that you made all the components there's a better-than-average chance that they might speak to each other, creating something better than the sum of its parts. Check out my blog post here about another FrankenQuilt made from fragments of different projects.
- Every quilt doesn't have to make sense. It's okay if the theme is "Play!" The thought of entering my new Mariner's Compass in a show makes me nauseous. But of putting it on my wall, or the wall of someone who is not a quilt show judge, architect, or any kind of perfectionist, makes me very, very happy.