Here's a cross-body 7" x 9" upcycled denim pouch that can be worn inside-out, or outside-in. In fact, it's not at all clear to me which way is out! Let's call this Side A, Orientation 1....
Turn it over to see Side A, Disorientation 1
Open it up, reach inside, pull out the inside, and here's Side B, chaos...

....and Side B, not so chaotic....

This makes a guaranteed unique gift and even if you don't crochet, you can improvise alternatives. Here's how it happened.
It all started out, as most of my stuff, as therapy sewing. I love sewing wedges, especially wedges made from old jeans. The soothing blues, the foamy whites, the gentle oceanic ripples and creases that I'm too lazy to press out; wedges give it all a wavy feel. Sometimes I cut wedges improvisationally...
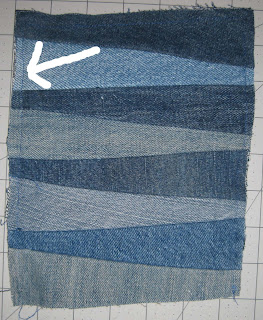
...and sometimes I use a wedge ruler, like I did for this project. I started out with a light set and a dark set. Here's the finished side of both sets, both about 7" x 8".
Their reverse sides:
As usual, I couldn't decide which I liked better! The finished side is neater, but the oh those raw edges!!! So I decided to sew my two panels together with one wrong side facing one right side! I did a straight stitch around three sides (stitching shows best where the arrow is pointing.)
Next, I used my handy Edge Perfect blade (no financial affiliation) ...
...to cut evenly spaced holes just outside the stitching. I did a blanket stitch through the holes with a light blue perle cotton.
The flip side:
I also cut holes along the top. The next step was to do a couple of rounds of single crochet with the light blue embroidery floss. Along the top opening, I separated the layers before crocheting. (If you're not a crocheter, you don't need to do this at all. Or you could conceivably sew or even GLUE trim around the edges. Just a pompom trim along the bottom?)
Next, crochet a flap, and make it loose in the area where it is likely to meet a button. I crocheted a circle, but a square, triangle, parallagram, etc. would work, too. If you're really good at crochet, unlike me, make a fabulous mandala! Here's my non-fabulous flap.
If you're not a crocheter, you could cut a scrap of leather, faux leather, ultrasuede, or even another piece of denim, etc., to make the flap. You will need to cut a buttonhole, soon.
Stitch the flap securely to one side of the purse.
On the flip side, place a button. I used a white plastic shank button on this side.
If you crocheted your flap loosely, you don't need to "make" a buttonhole - just button through the crochet. If you're using an alternative - say a piece of ultrasuede - use this button placement to cut a buttonhole.
Reach in and pull out the reverse side, and plant another button where the hole in your flap will meet it. On this side, I used a vintage mother-of-pearl and metal shank button.
And here's the back:
I added a round of dark blue crochet to the purse edges. I crocheted a 47" strap using double crochet, sized for an adult, but of course you should size it to whoever will use the purse. This is a good project for teaching youngsters to sew and/or crochet! For many more denim and crochet projects, click "denim" in my word cloud on the right! For bags, click on purse.


This is way cool! You always have such wonderful ideas!
ReplyDeleteThat makes two of us, Deb!
DeleteI wondered how you were able to crochet on Jean fabric. So you do the buttonhole stitching in the holes then crochet off the button hole stitch? I love the fact that you appreciate amd embrace the frayed chaotic side of things. Such is life 😉
ReplyDeleteYes, exactly, I do a blanket stitch through the holes cut by the Edge Perfect blade.Then I crochet through the part of the floss that runs parallel to the edge. I can do as many rounds to build it outward as I like! Does that make sense? The Edge Perfect blade isn't mandatory, one could poke holes with a needle, but I think it puts less stress on the fabric, and of course the holes are evenly spaced. Can't alter the spacing, unfortunately. Thanks for the thoughts!
DeleteLovely tutorial! And, the edge perfect blade sounds aptly named. Probably lots easier on the wrists and hands than forcing a needle through the denim! Love this! Your creations are delightful!
ReplyDeleteAw shucks, Jeri! You're easily delighted! That delights me!
Delete